Developer setup
Developers are those who contribute to the Mu-PRO code.
Here we introduce how you can get prepared for Mu-PRO code development and work with other developers.
Basics
Access git repository
The MuPRO PhaseFieldSDK’s git repository is a private repository hosted on github.
To get started as a SDK developer, you need to explicitly request access to the MuPRO organization.
Step 1: Register a github account
Follow the instructions on github homepage to Sign up for an account.
Step 2: Figure out your username
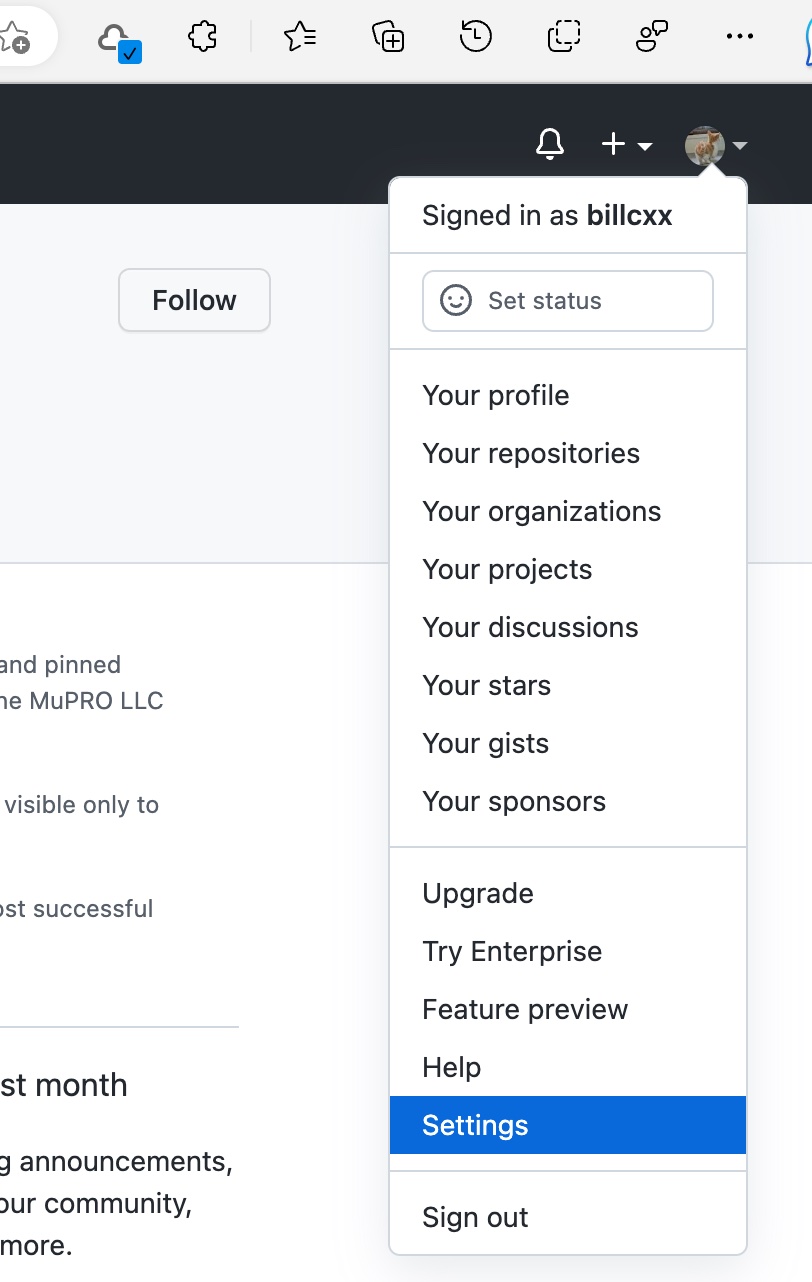
- go to github.com
- click your avatar in the upper right corner, the word after Signed in as is your account username
Step 3: Request access to MuPRO organization
Send your account username to MuPRO at [email protected], stating your name, github account username and the repository you want to get access.
Install Visual Studio Code
Though you can use any code editor you prefer, we highly recommend vscode. Here are some useful links for using vscode:
- Developing a Visual Studio Code Project for SSH Development
- Environment Configurator for Intel® oneAPI Toolkits
Step 1: Download and install
Download and install vscode on your local machine from here.
Step 2: Sign in with Github account
Sign in will give you benefit of syncing all settings and extensions across all platform.
- Click the human icon at the lower left corner
- Select Sign in to Sync Settings
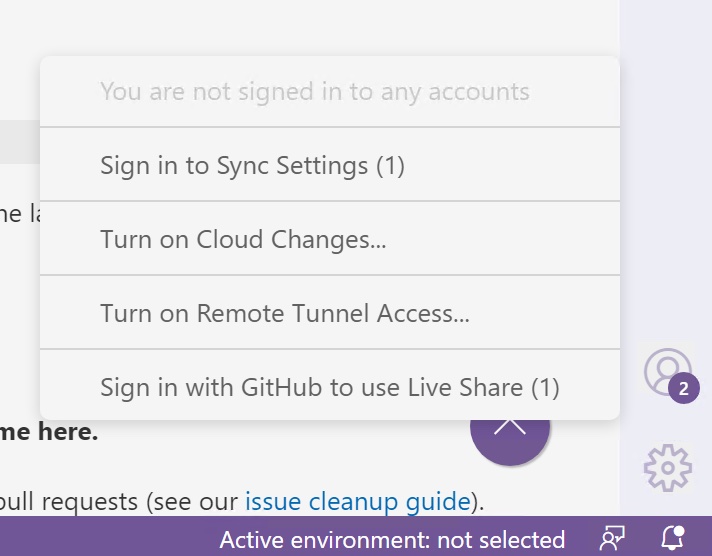
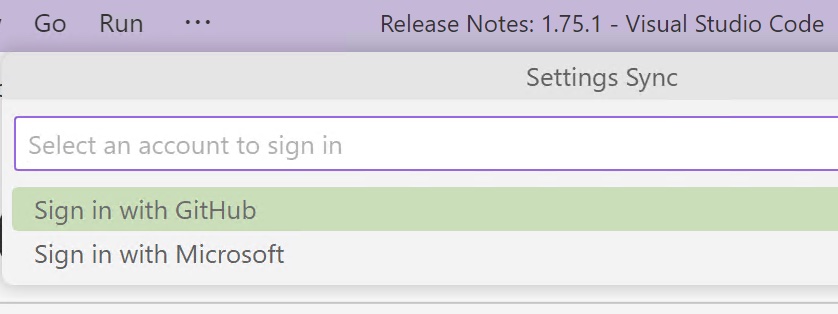
- Then select Sign in with Github, and your default browser will be opened
- Sign in to Github from the popped up browser window.
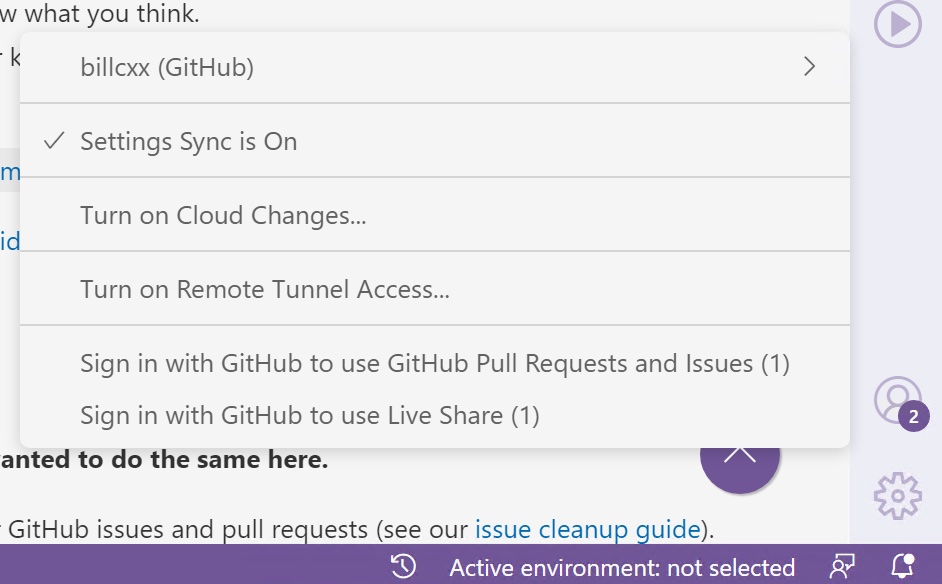
- If you have successfully signed in, then clicking the human icon will show your github account username, and you can close the browser window.
Step 3: Install extensions
One huge benefit of using vscode is its large extension base. Here is a list of the extensions that we will use:
Develop on a remote machine
- Remote - SSH (Id: ms-vscode-remote.remote-ssh): useful for remote ssh connection
- Remote - SSH: Editing Configuration Files(Id: ms-vscode-remote.remote-ssh-edit): used when editing ssh config file
Develop on your local machine
You don’t need to install any extension for now, because we can install recommended extension all at once in future step.
Configure SSH connection
In most cases, you probably are developing on a remote linux server instead of your own local pc.
Here we will use the Penn State ACI server as an example demonstrating how you should configure SSH connection within vscode.
Step 1: Setup passwordless connection
To set up passwordless SSH connection to a remote Linux server, you will need to generate a public/private key pair on your local machine and copy the public key to the remote server. Here’s a step-by-step guide to get you started:
Linux/Mac
- Generate the key pair: Open a terminal window on your local machine and run the following command
ssh-keygen -t rsa. The command will prompt you to choose a location for the key pair, you can accept the default location by hitting enter, or you can choose to give it a specific name, such asaci_rsa. You will also be asked to provide a passphrase, but for a passwordless connection, you can leave this field empty by hitting enter. - Copy the public key to the remote server: The public key is stored in the file
~/.ssh/id_rsa.pub. To copy the public key to the remote server, use the following commandssh-copy-id [email protected], this will copy the default id_rsa.pub key to the remote server. If you used a different name for the rsa key pair, you can specify it with the-ioption like this,ssh-copy-id -i ~/.ssh/aci_rsa [email protected]
Windows
-
Generate the key pair:
- Download and install PuTTYgen: You can download the PuTTYgen tool from the PuTTY website (https://www.putty.org/).
- Start PuTTYgen: Once you have installed PuTTYgen, start the tool from the Start menu or by double-clicking on the PuTTYgen icon.
- Generate the key pair: In the PuTTYgen window, click the “Generate” button. The tool will prompt you to move your mouse around the window to generate randomness for the key pair. Once the key pair is generated, you can enter a key passphrase or leave the field empty for a passwordless connection.
- Save the key pair: Once you have generated the key pair, you can save the private key by clicking the “Save private key” button and specifying a location for the file. You can also save the public key by copying its contents from the “Public key for pasting into OpenSSH authorized_keys file” text box and saving it to a file.
-
Copy the public key to the remote server: Open a Command Prompt or PowerShell window and run the following command
type "C:\path\to\id_rsa.pub" | ssh [email protected] "cat >> ~/.ssh/authorized_keys". ReplaceC:\path\to\id_rsa.pubwith the path to your public key file, user with the username on the remote server. Thetypecommand outputs the contents of the public key file, which are then piped to an ssh command that logs in to the remote server, appends the contents of the public key to theauthorized_keysfile in the.sshdirectory of the user’s home directory, and creates the file if it does not exist. -
Test the connection: Once the public key is copied to the remote server, you can test the connection by running
ssh [email protected]. This should connect you to the remote server without asking for a password. If everything is working as expected, you have successfully set up a passwordless SSH connection.
Step 2: Edit ssh config file
To further save your time typing your user name and the remote server’s host name, we can setup the ssh config file as follows.
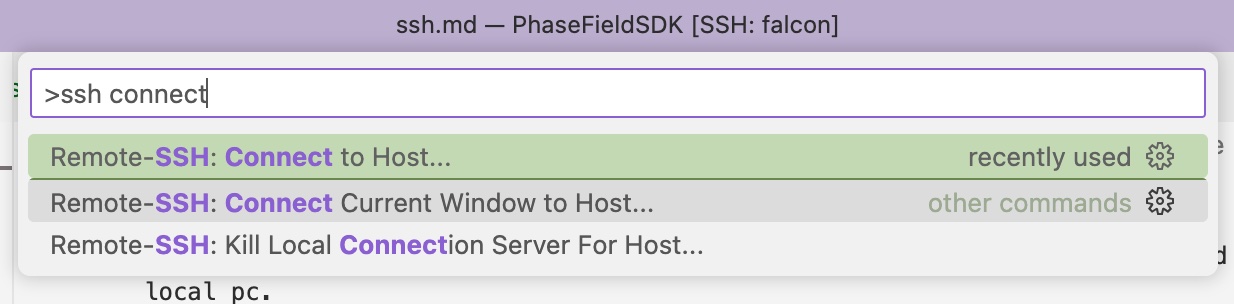
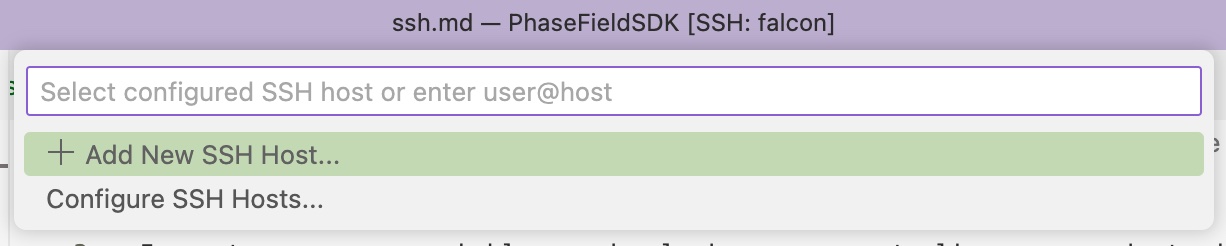
- Click
F1to open the command palette, and typessh connectto search for Remote-SSH: Connect to Host, then click
- You will see two choices of Add New SSH Host or Configure SSH Hosts, select the Configure SSH Hosts
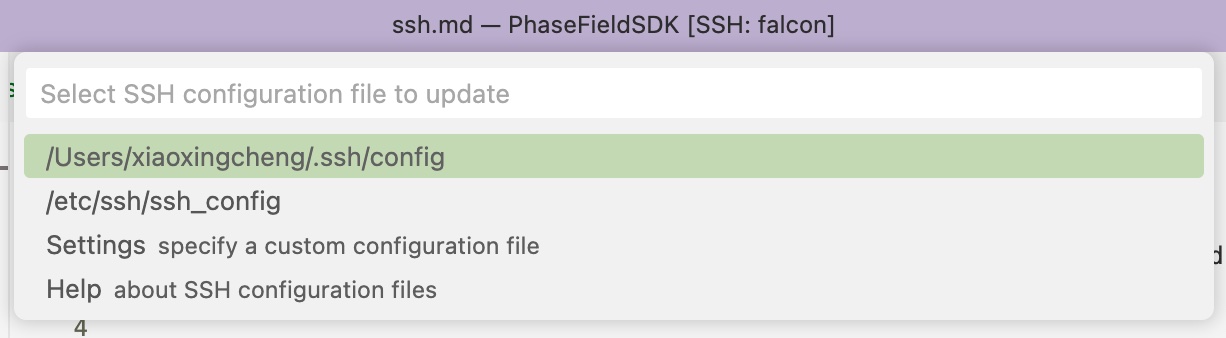
- vscode will automatically detect available ssh config files on your system, you should choose your personal one instead of the system config file, and that ssh config file will be opened in vscode. To me that’s /User/xiaoxingcheng/.ssh/config
- Change the User with your username, and the IdentityFile with the generated/uploaded rsa key pair name in the following code snippet. Then, copy and paste it into the opened config file.
Host aci
    HostName submit.aci.ics.psu.edu
    User username
    IdentityFile ~/.ssh/aci_rsa
    ForwardX11Trusted Yes
    ForwardX11 Yes
Step 3: SSH login
- Open vscode
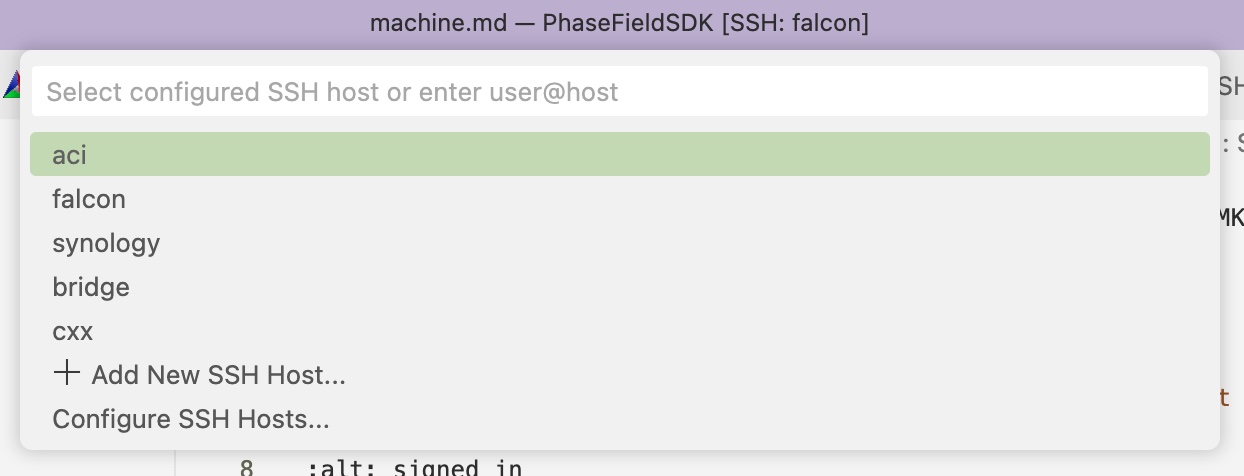
- Click
F1, typessh connectand clickRemote-SSH: Connect to Host
- Choose
aci, which is theHostwe defined in previous step.
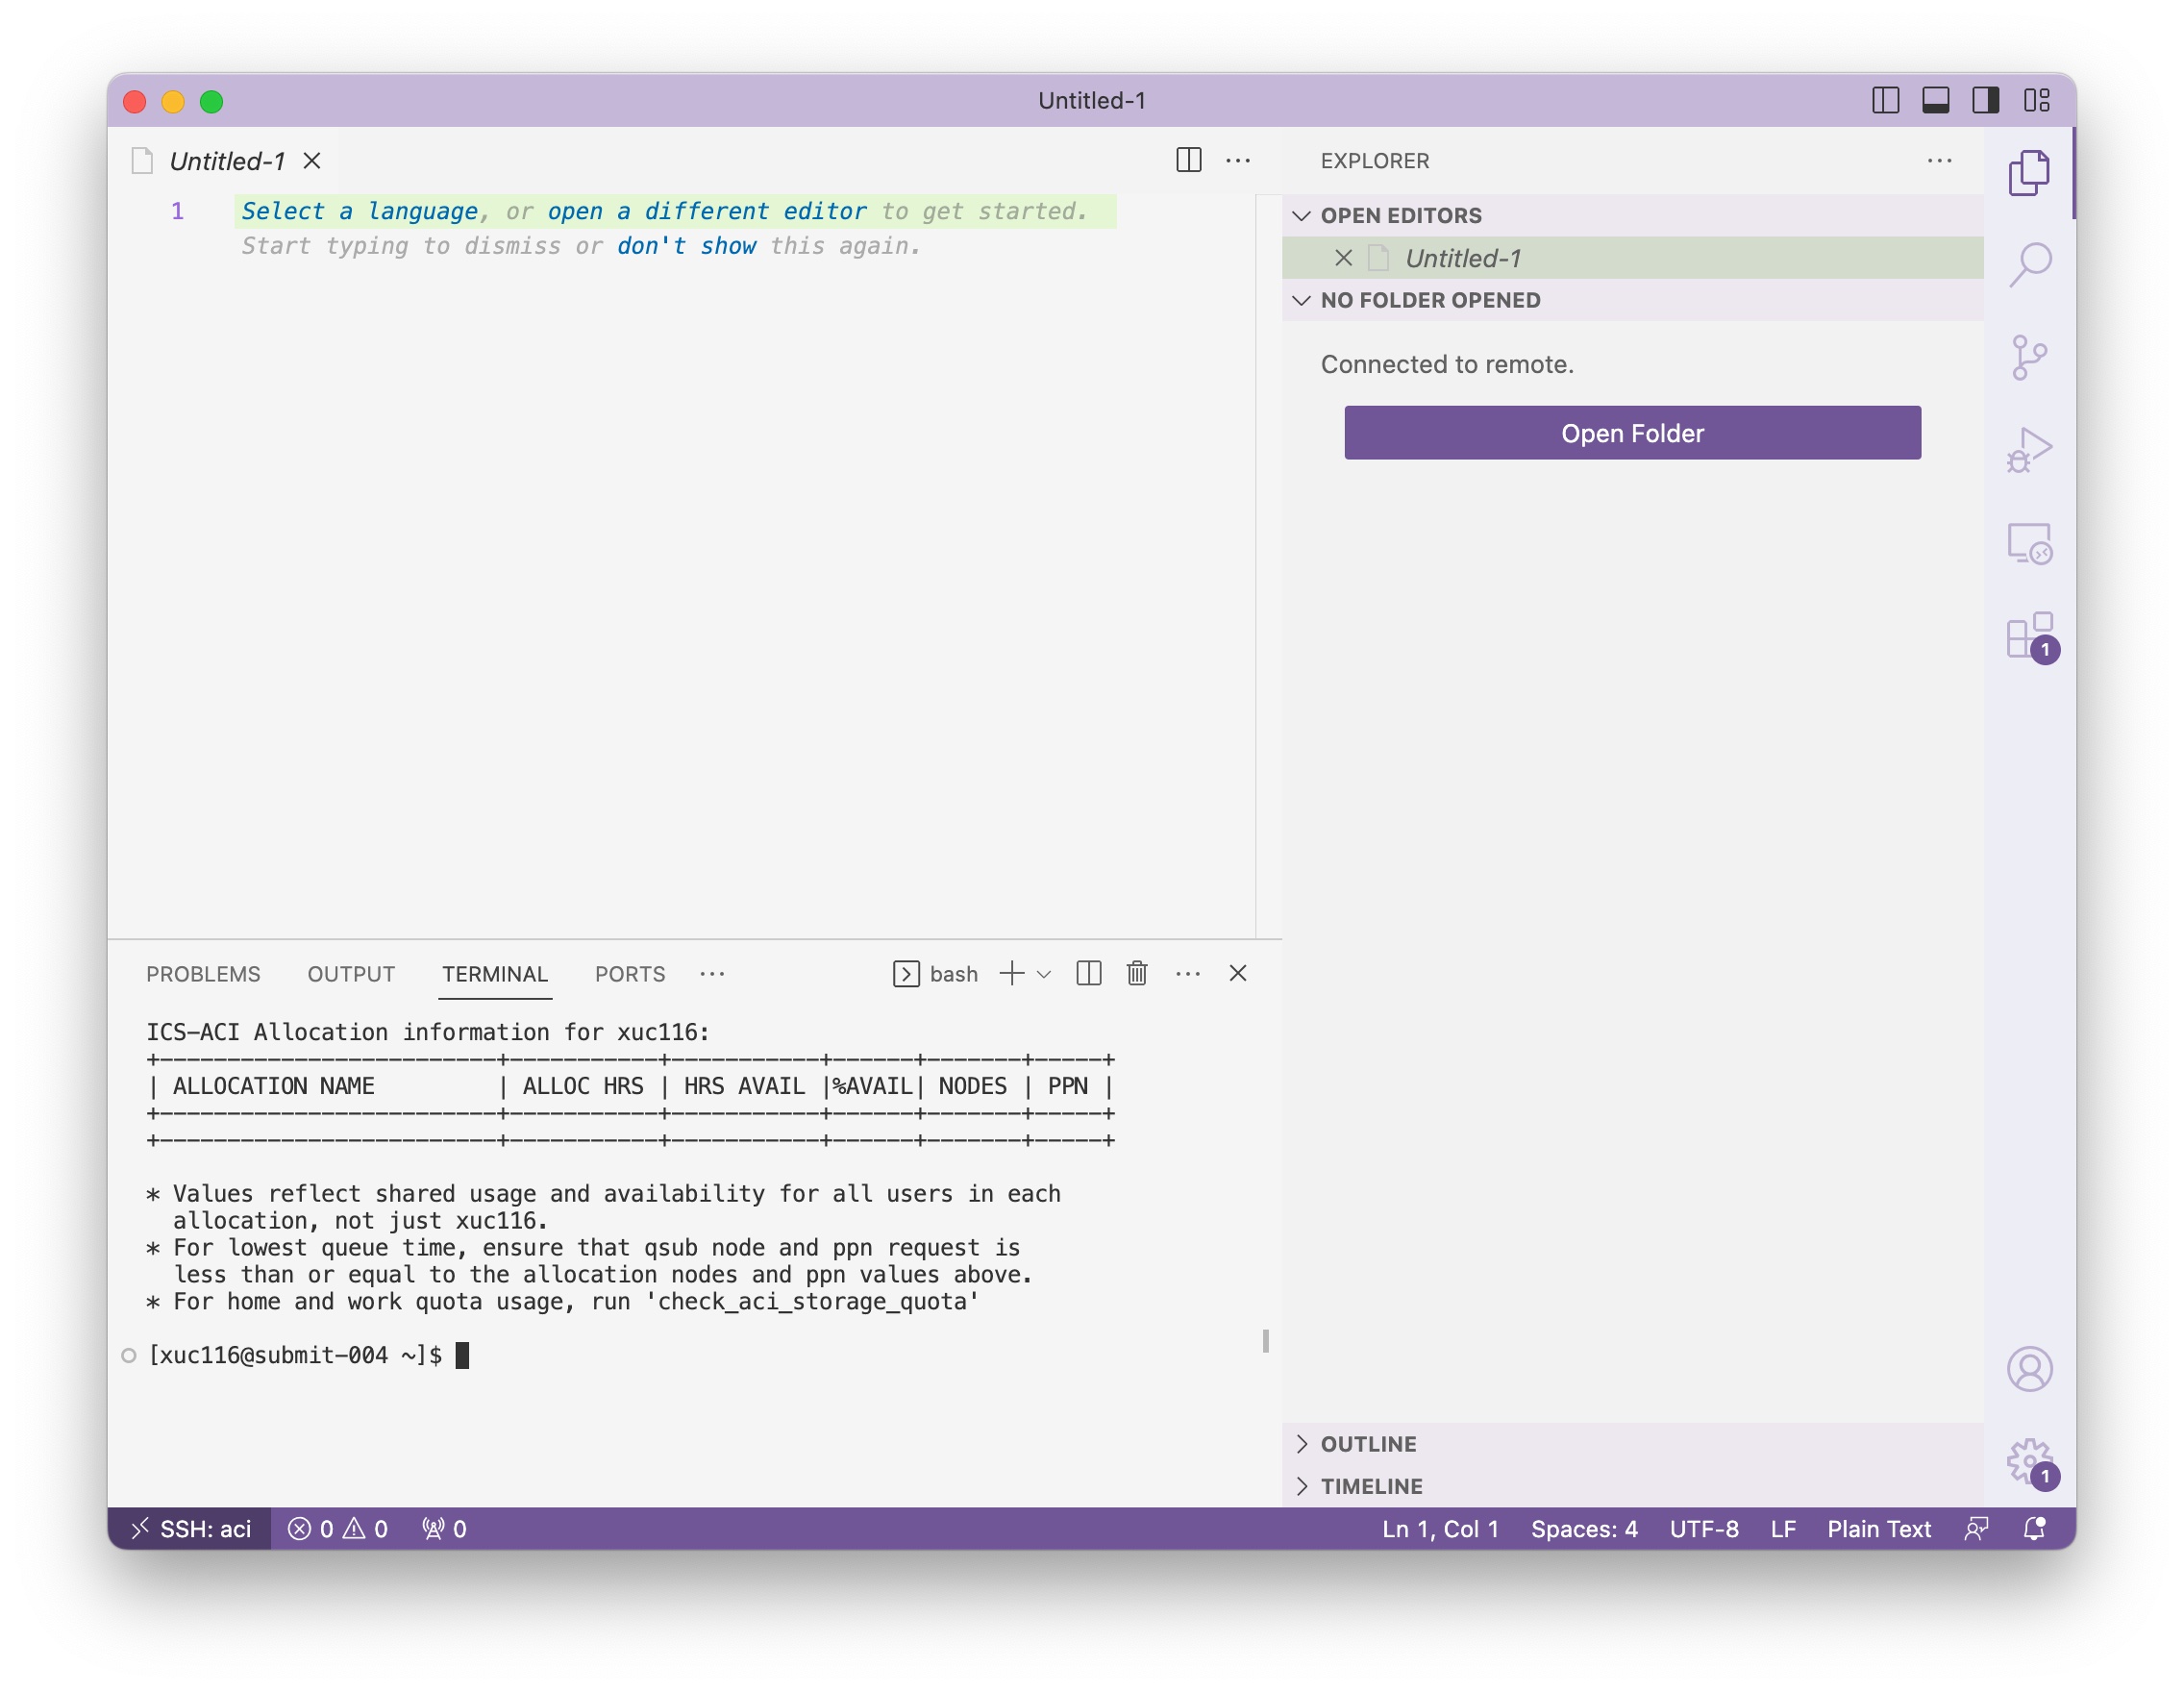
- You will see an interface similar to this one, and we can use the terminal to perform any command line tasks in the future. If you don’t see the terminal panel, you can use the shortcut
ctrl+`, or clickView/Terminalin the menu.
Setup building environment
To build the code, you will need to have Intel compiler, Intel MKL, Intel MPI, and CMake.
Step 1: Connect to the server
As we did in the Configure SSH connection section Step 3.
Step 2: Install CMake
We require a minimum version of 3.20 for CMake.
PSU ACI server
As of Feb 2023, you can access CMake on PSU server using the following command:
module load cmakeYou can also append the above command to your ~/.bashrc file so that cmake will be automatically loaded when you log in next time.
HPC cluster in general
Either contact the admin to find where you can find CMake version higher than 3.20, or you can follow the install instruction for Linux and install cmake for you locally.
Your own Linux machine
You should be able to find CMake in most of the distribution’s official package manager. Such on Ubuntu, you can install CMake with sudo apt install cmake.
Step 3: Setup Intel environment
PSU ACI server
As of Feb 2023, you can access the Intel compilers, Intel MPI, and Intel MKL on the PSU server using the following command:
module load intel impi mklYou can also append the above command to your ~/.bashrc file so that these intel packages will be automatically loaded when you log in next time.
HPC cluster in general
Contact the admin to learn how you can access the Intel compiler, Intel MKL, Intel MPI.
Your own Linux machine
Install the Intel oneAPI’s basekti and hpckit. Choose your machine’s package manager and follow its instructions.
Step 4: Configure git
You can clone a repository using https link or ssh link. For beginners, I recommend using the ssh approach.
You may follow the commands below for a simpler version, or follow steps on this github doc page for detailed instructions.
- Generate a new SSH key, substituting in your GitHub email address.
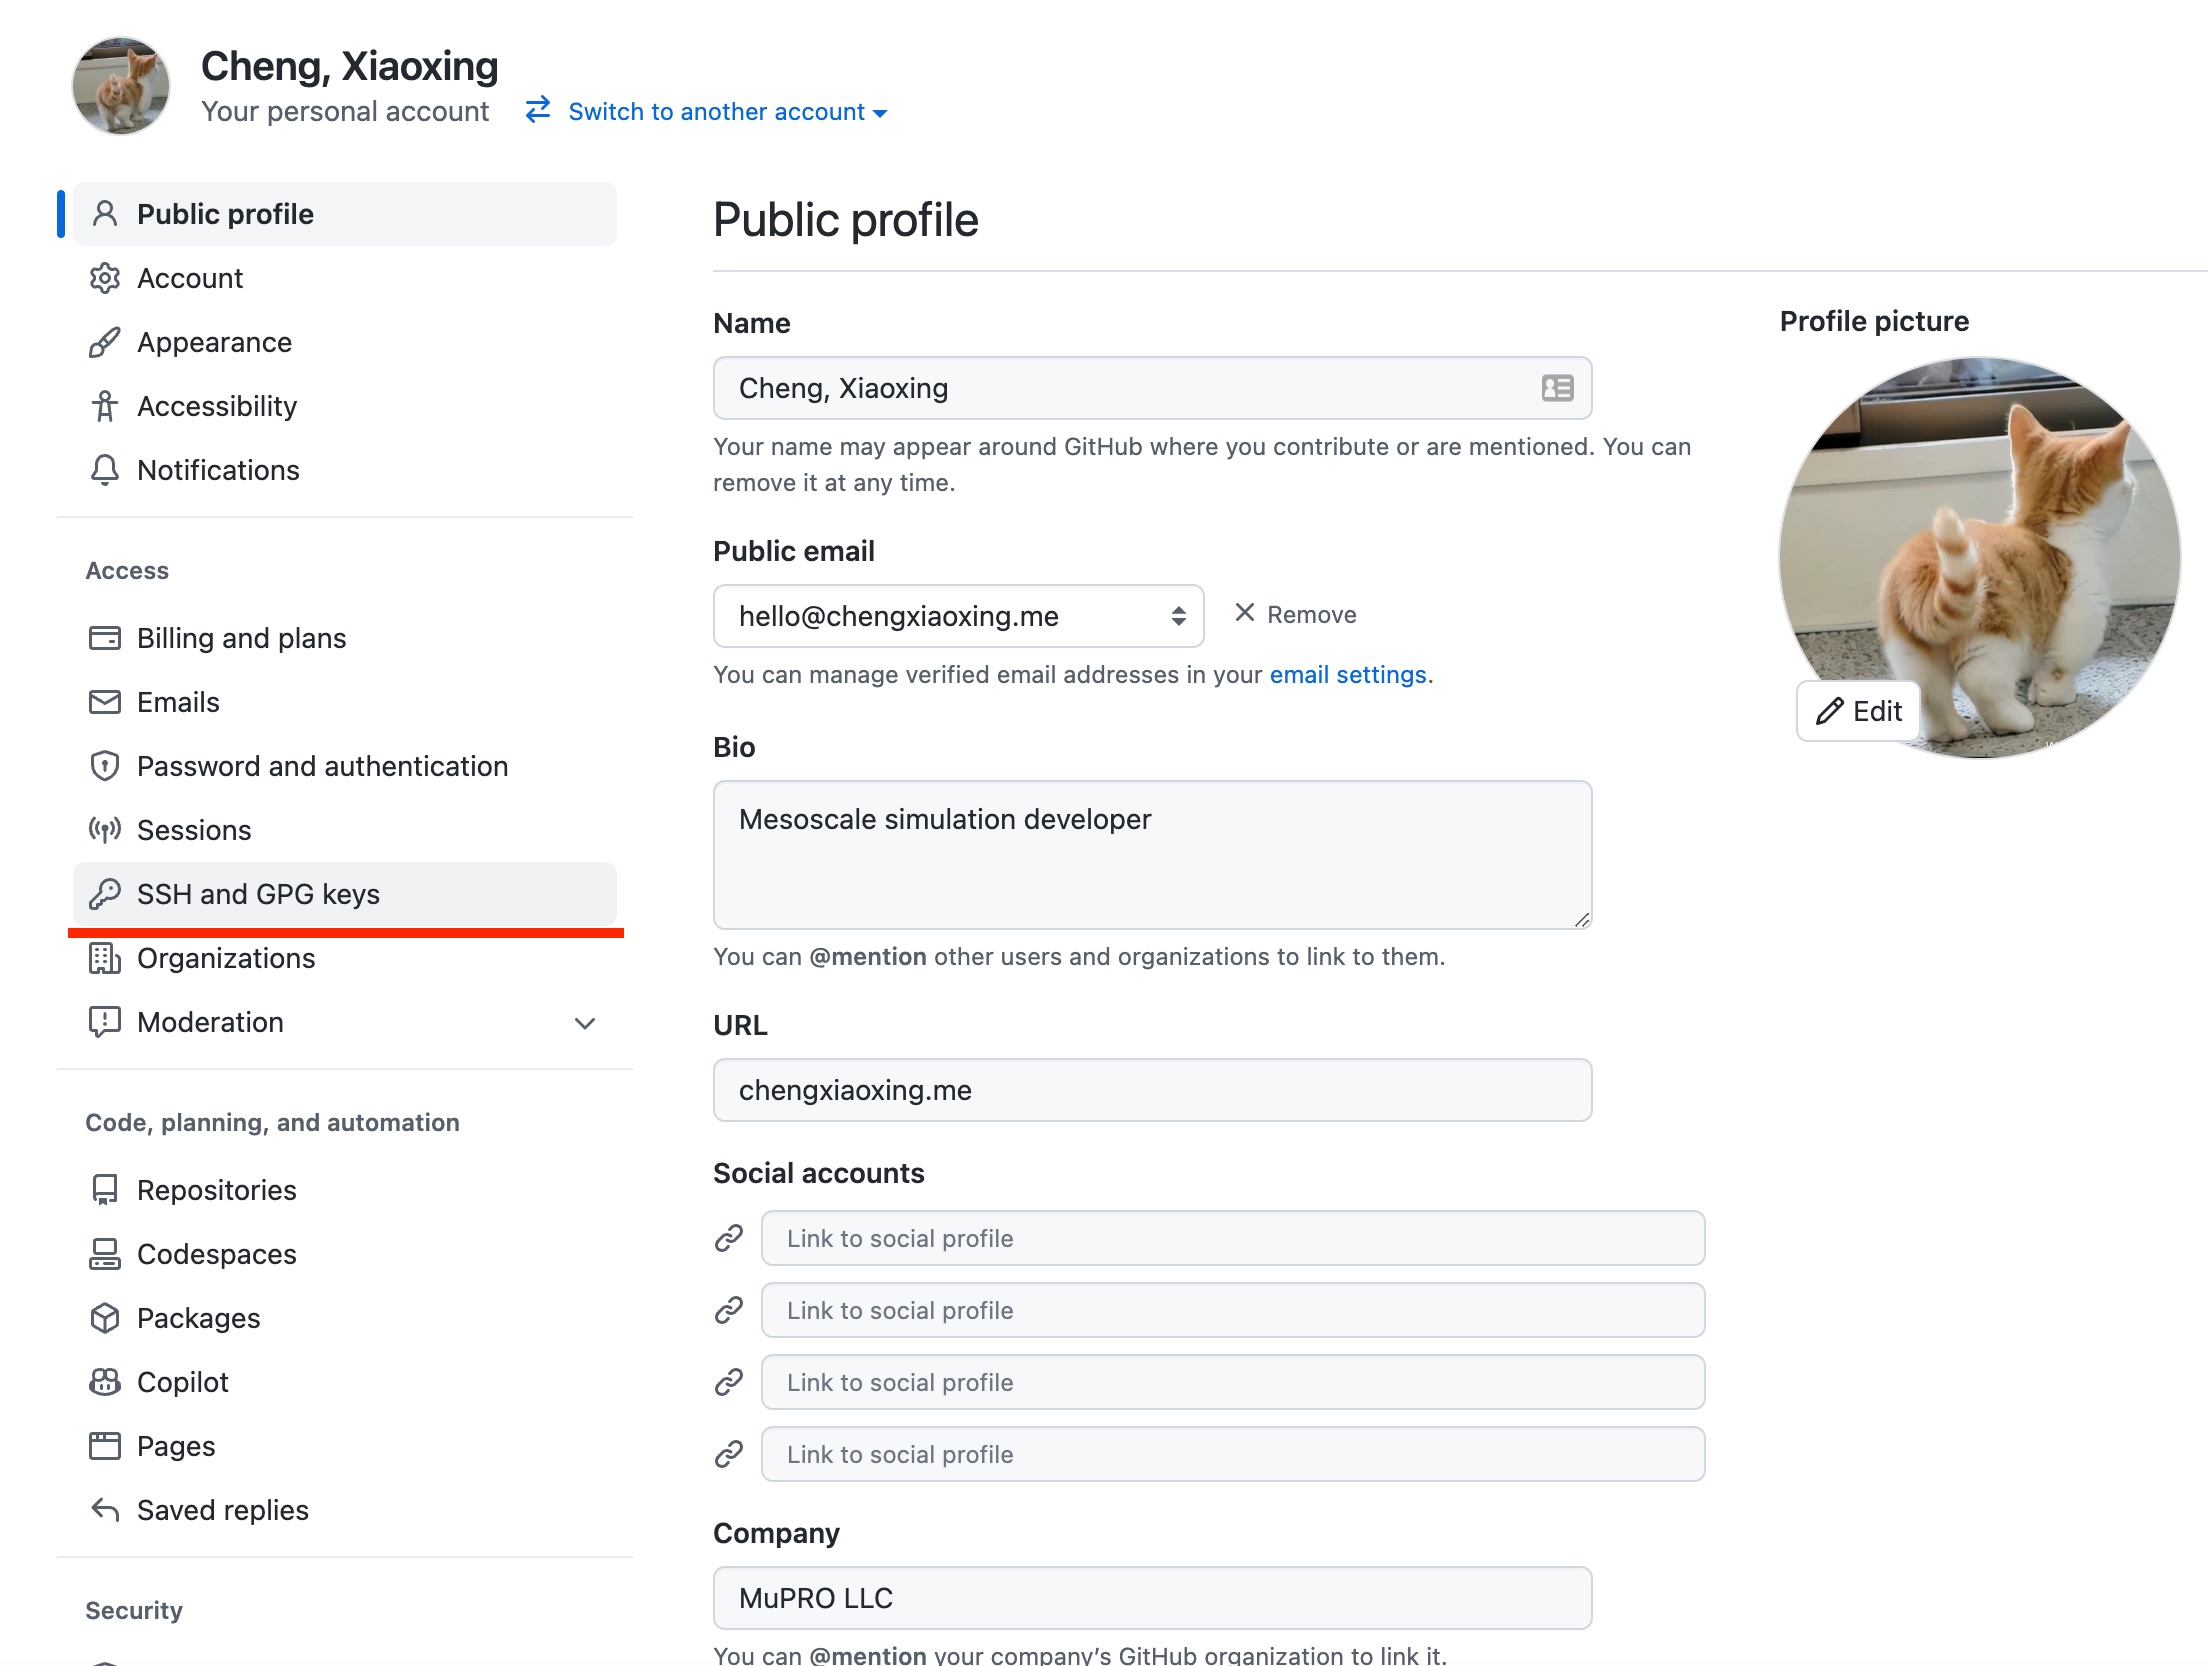
ssh-keygen -t ed25519 -C "[email protected]"- Go to your user’s Settings
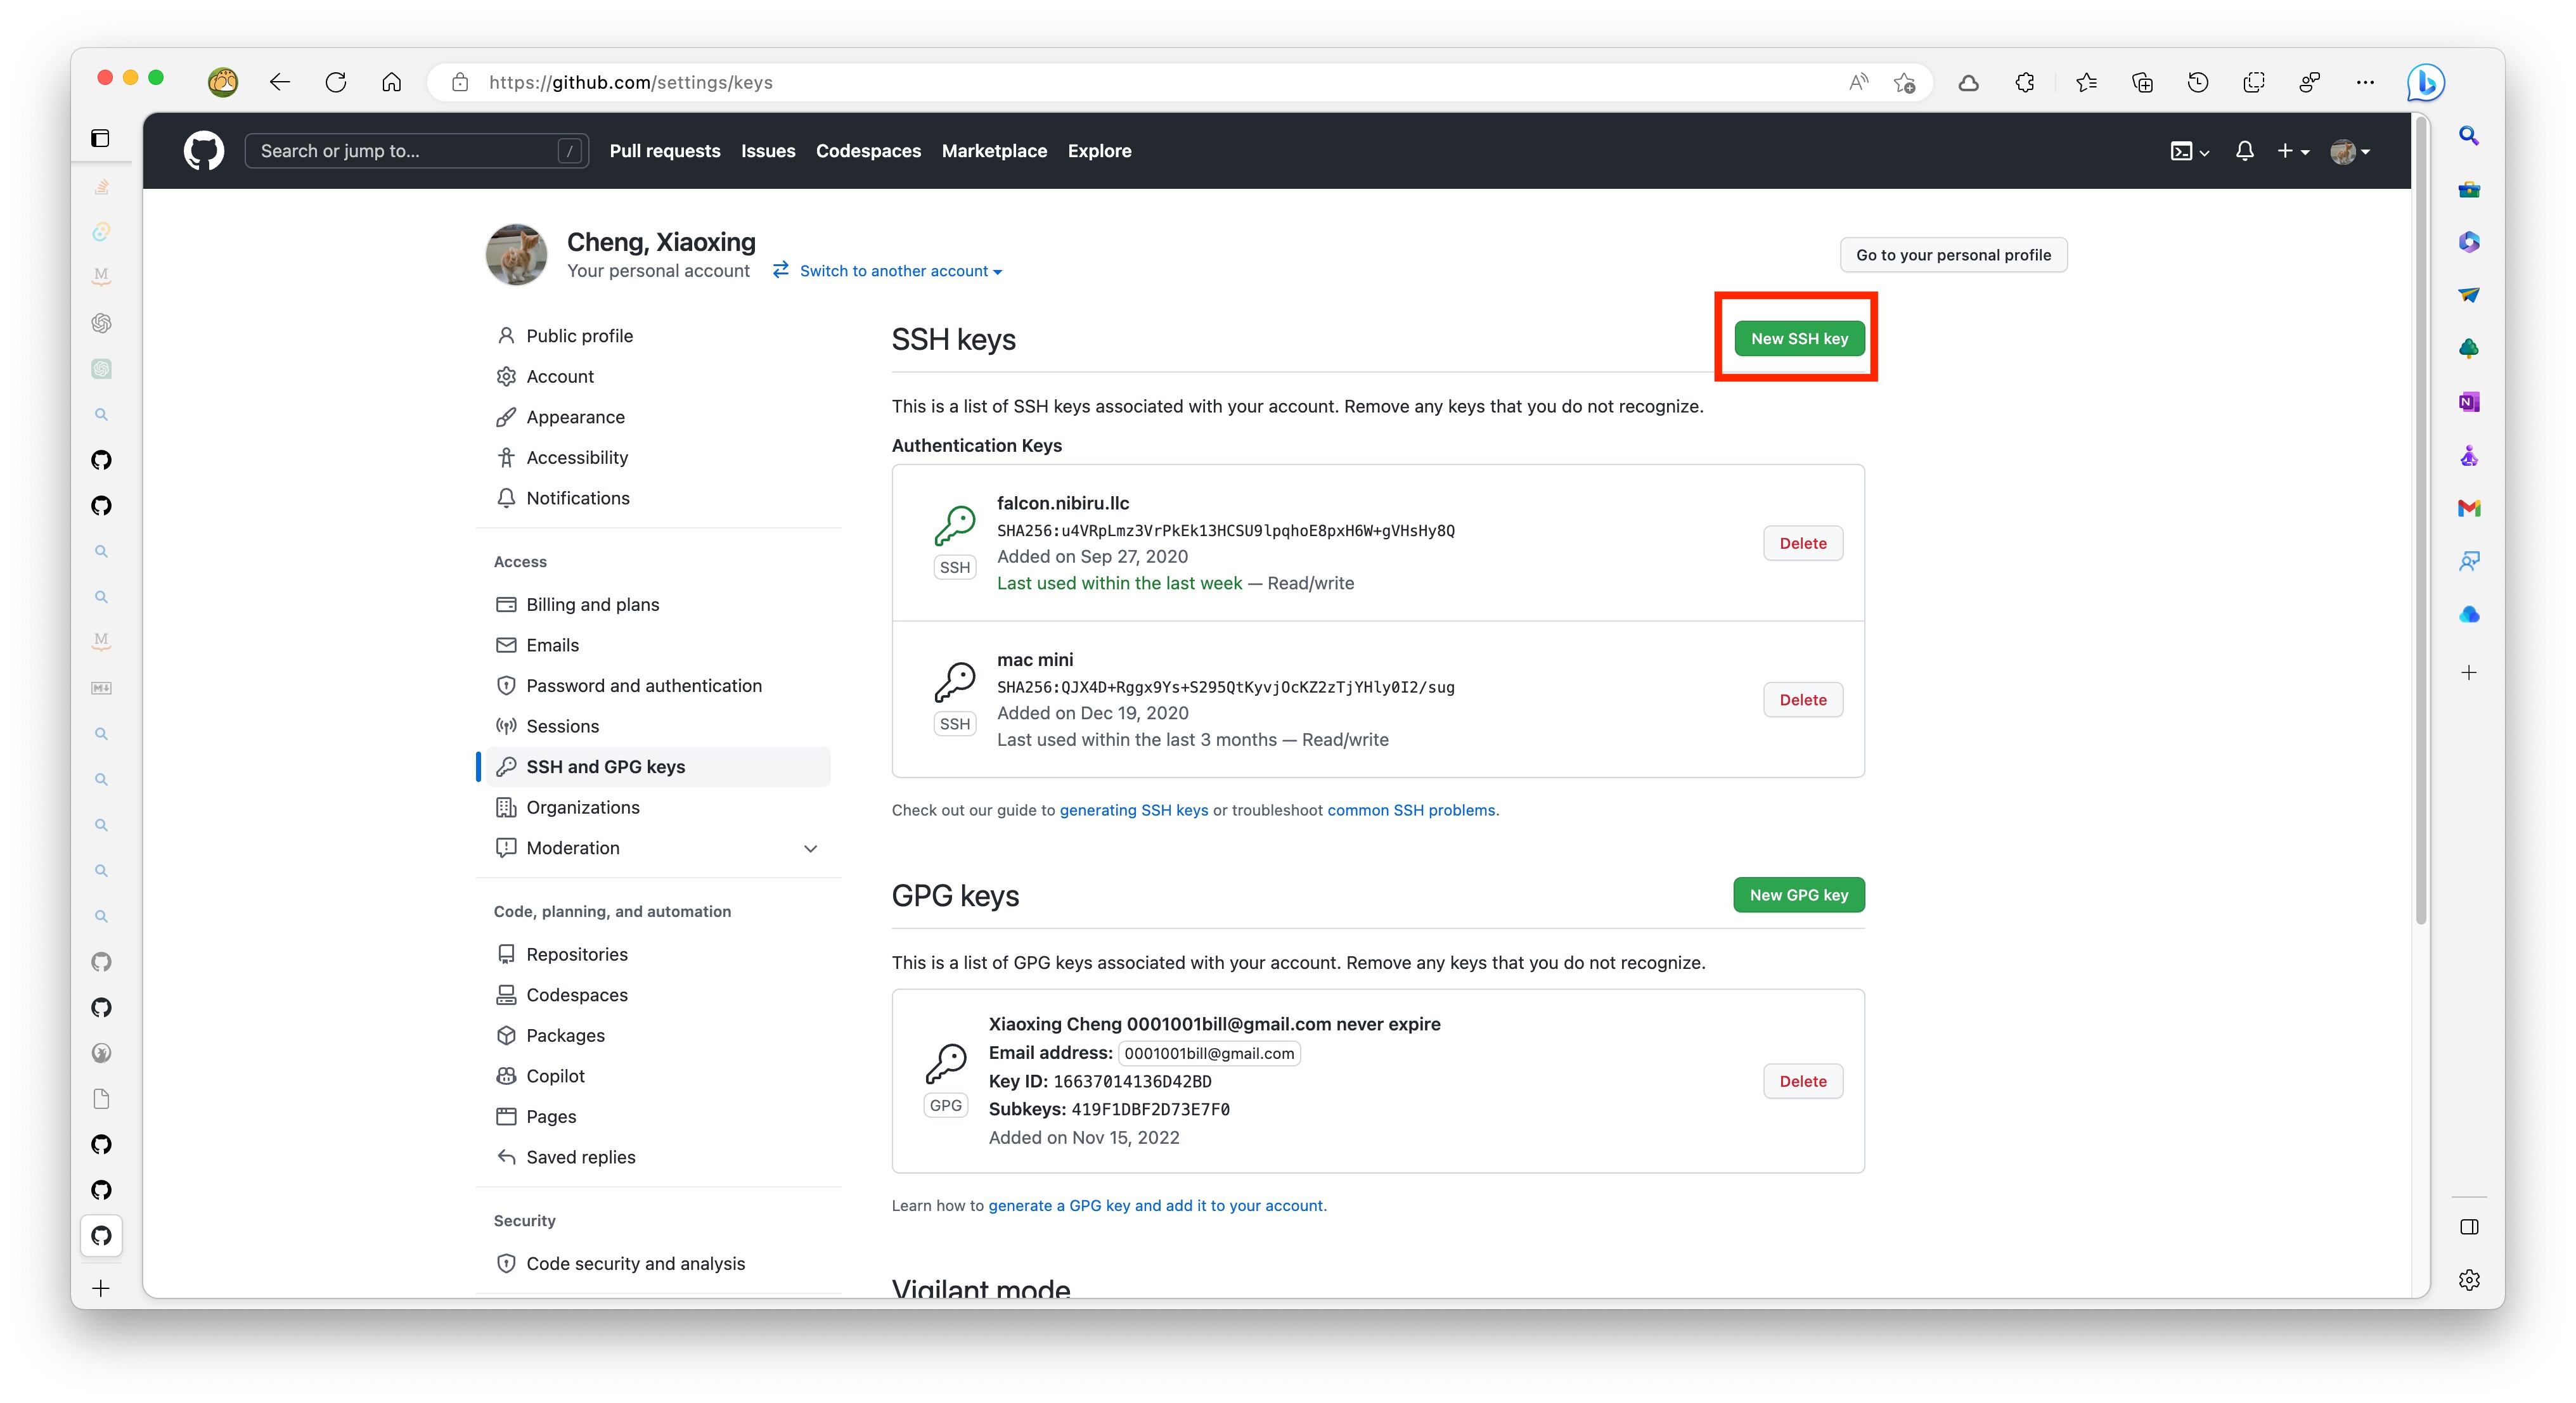
- Click SSH and GPG keys
- Click New SSH Key button
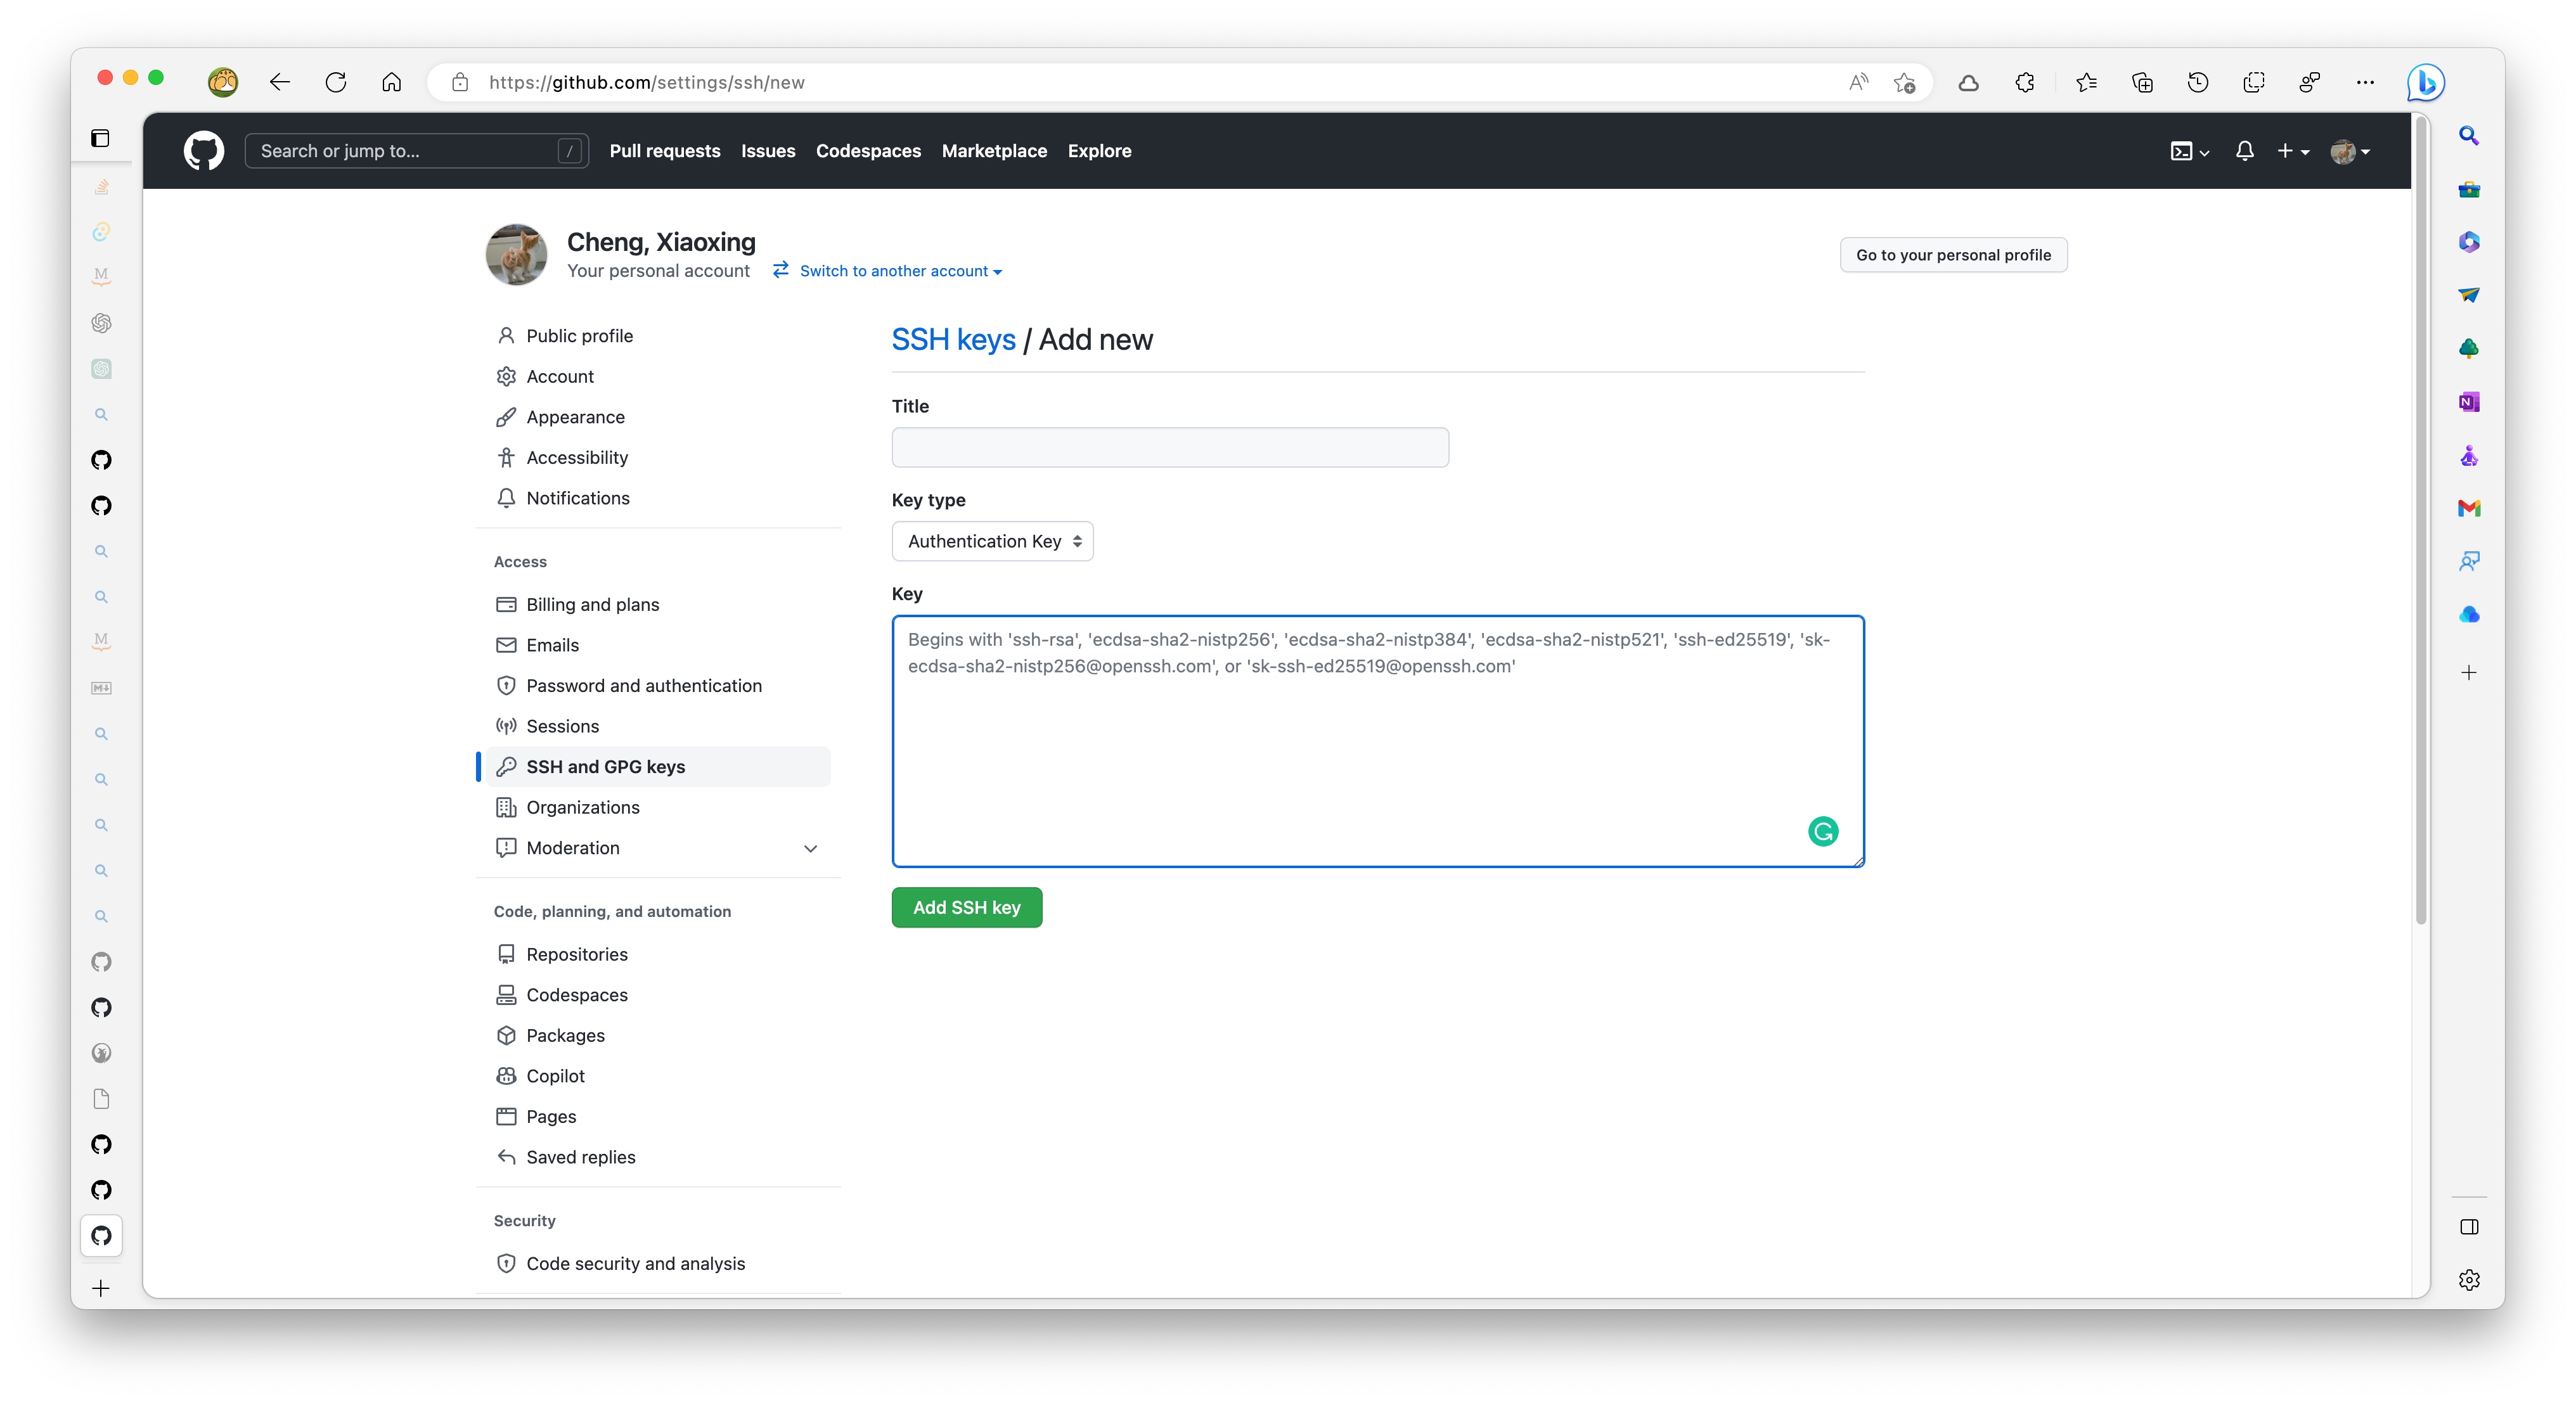
- Copy the SSH public key to your clipboard. If you use a different name for the generate key, then change the following command accordingly. Then select and copy the contents of the id_ed25519.pub file displayed in the terminal to your clipboard.
cat ~/.ssh/id_ed25519.pub- Paste the SSH public key to the Key text area and give it a title, such as aci, then click Add SSH Key
- Verify your new ssh key with the following command
ssh -T [email protected]. If successful, now you will be able to clone the source code from Github.
Obtain the source code
Step 1: Connect to the server
As we did in the Configure SSH connection section Step 3.
Step 2: Download the source code
You should use git to clone the repository. Remember to clone the source code to a permanent storage instead of temporary disk.
PSU ACI server
cd work
git clone --recursive [email protected]:mupro-simulation/PhaseFieldSDK.git
Other server/pc
git clone --recursive [email protected]:mupro-simulation/PhaseFieldSDK.git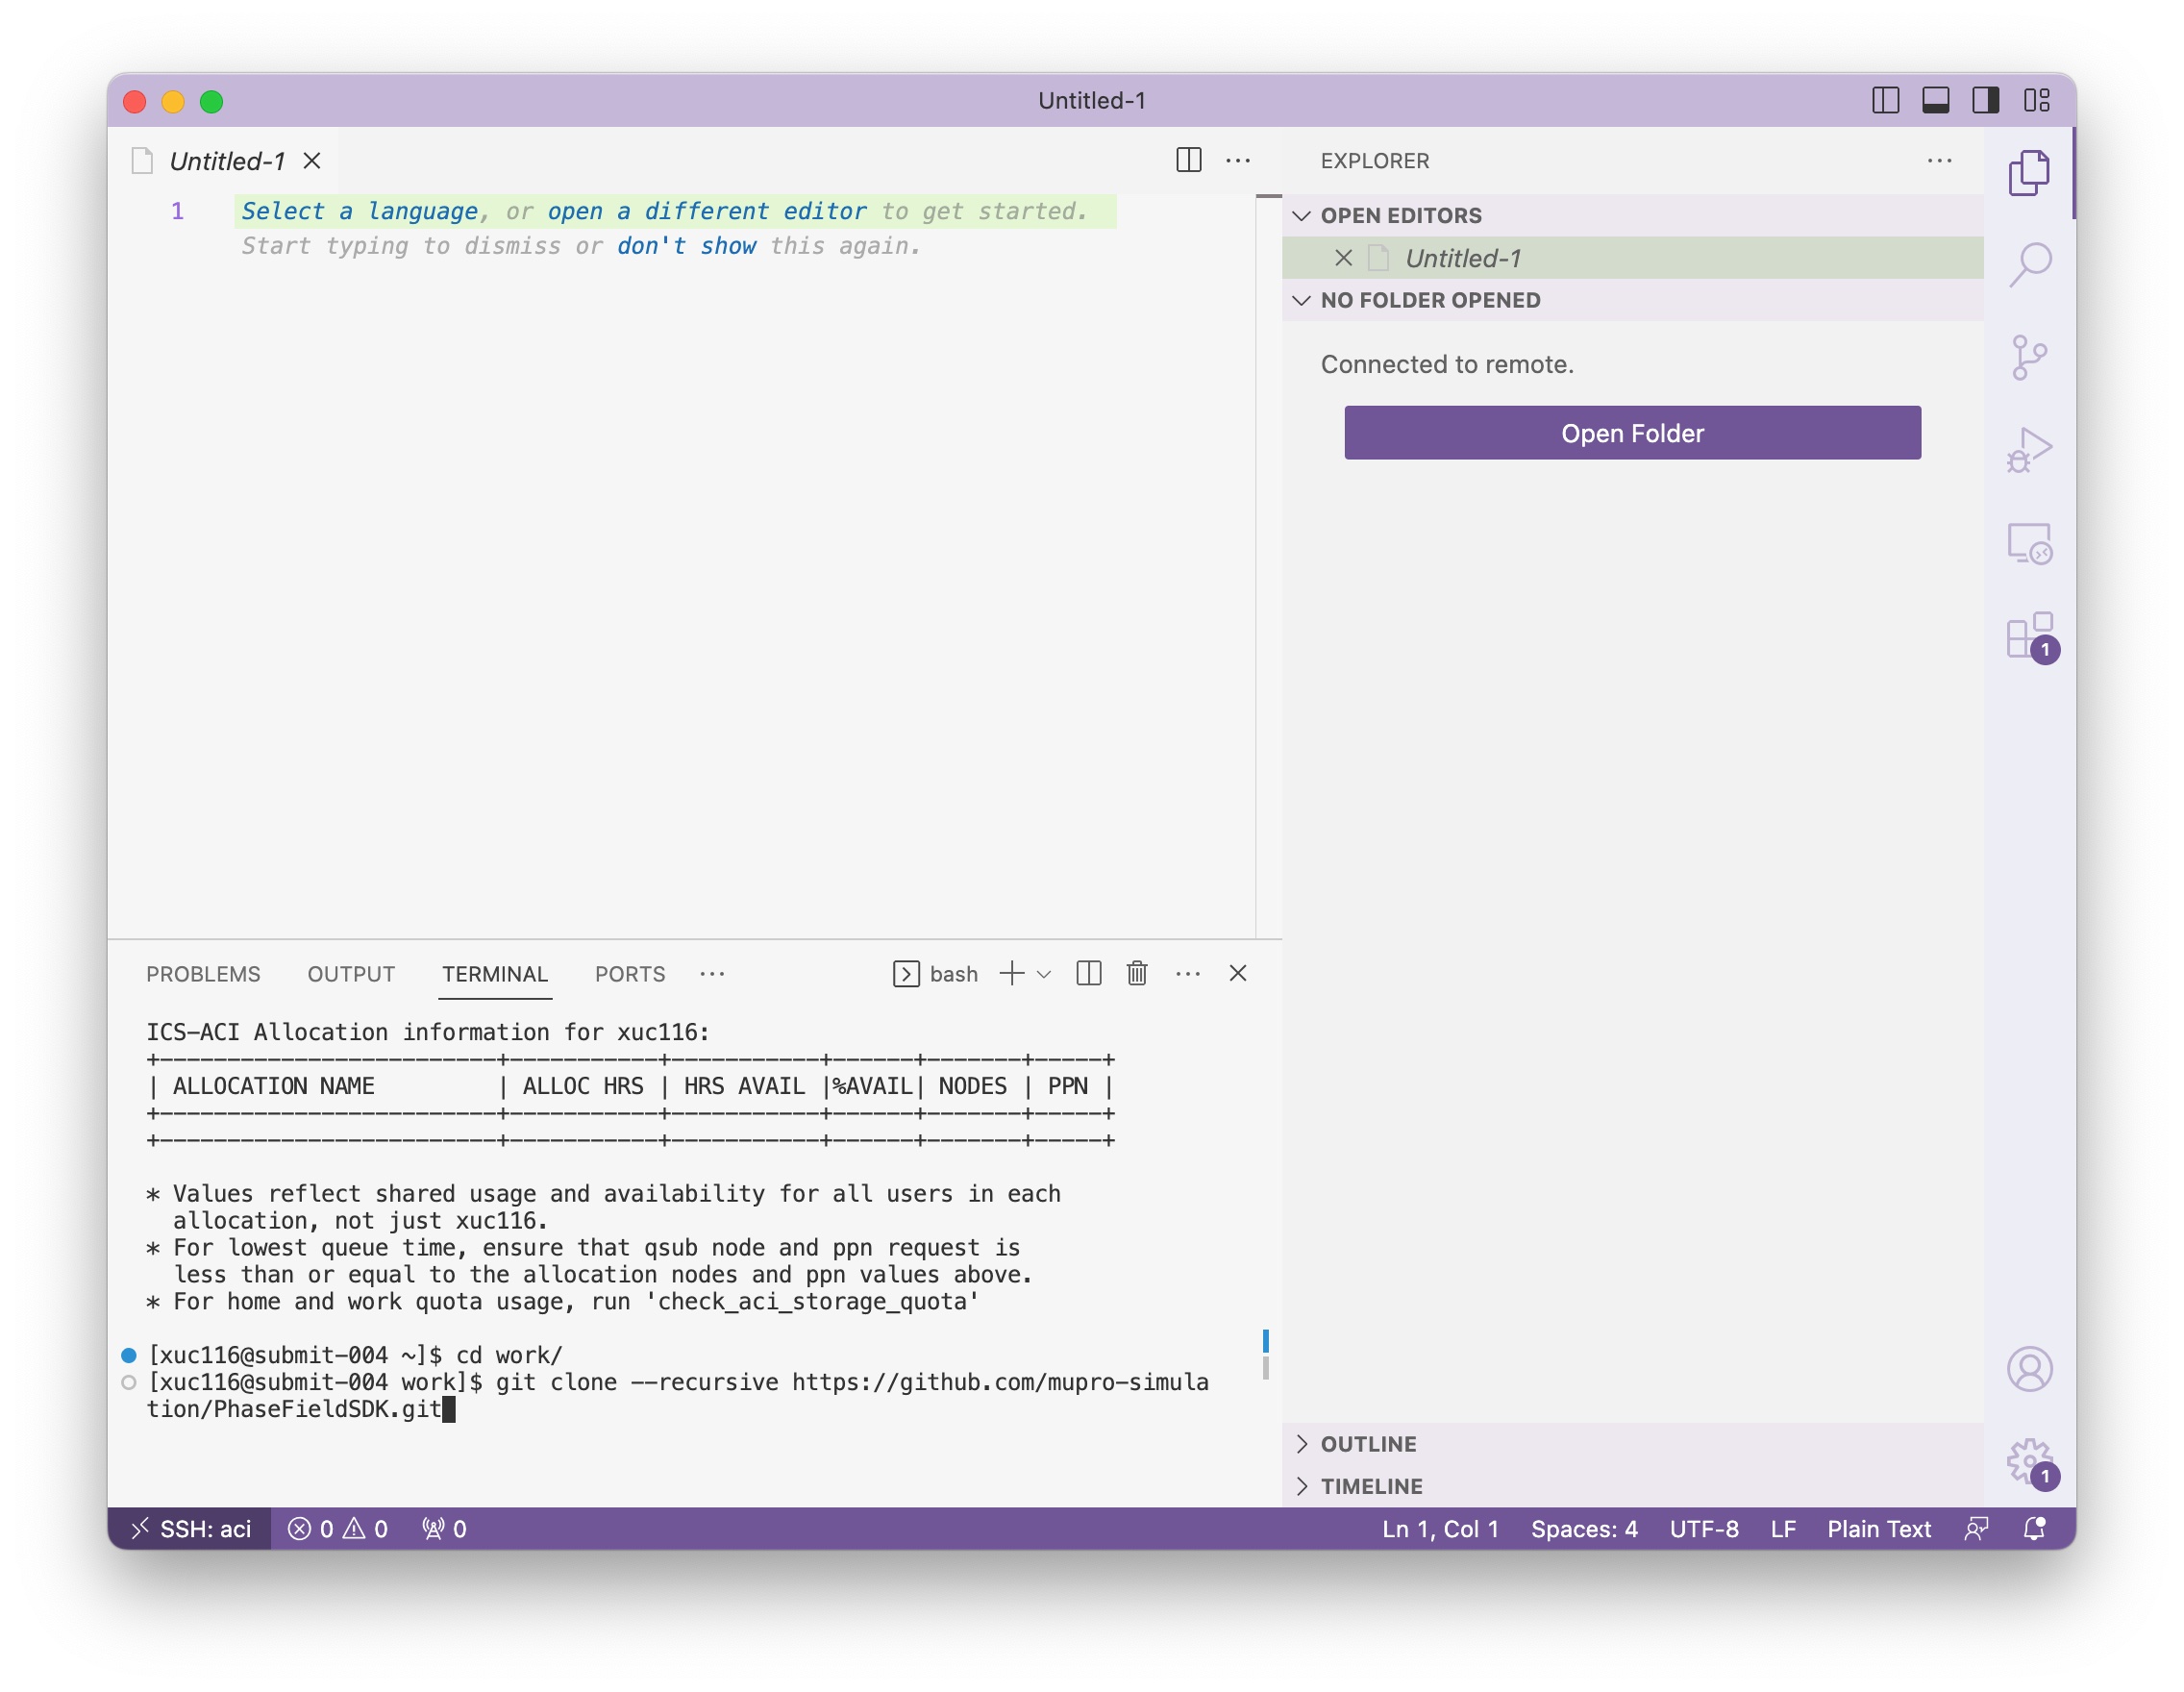
Step 3: Check the source code
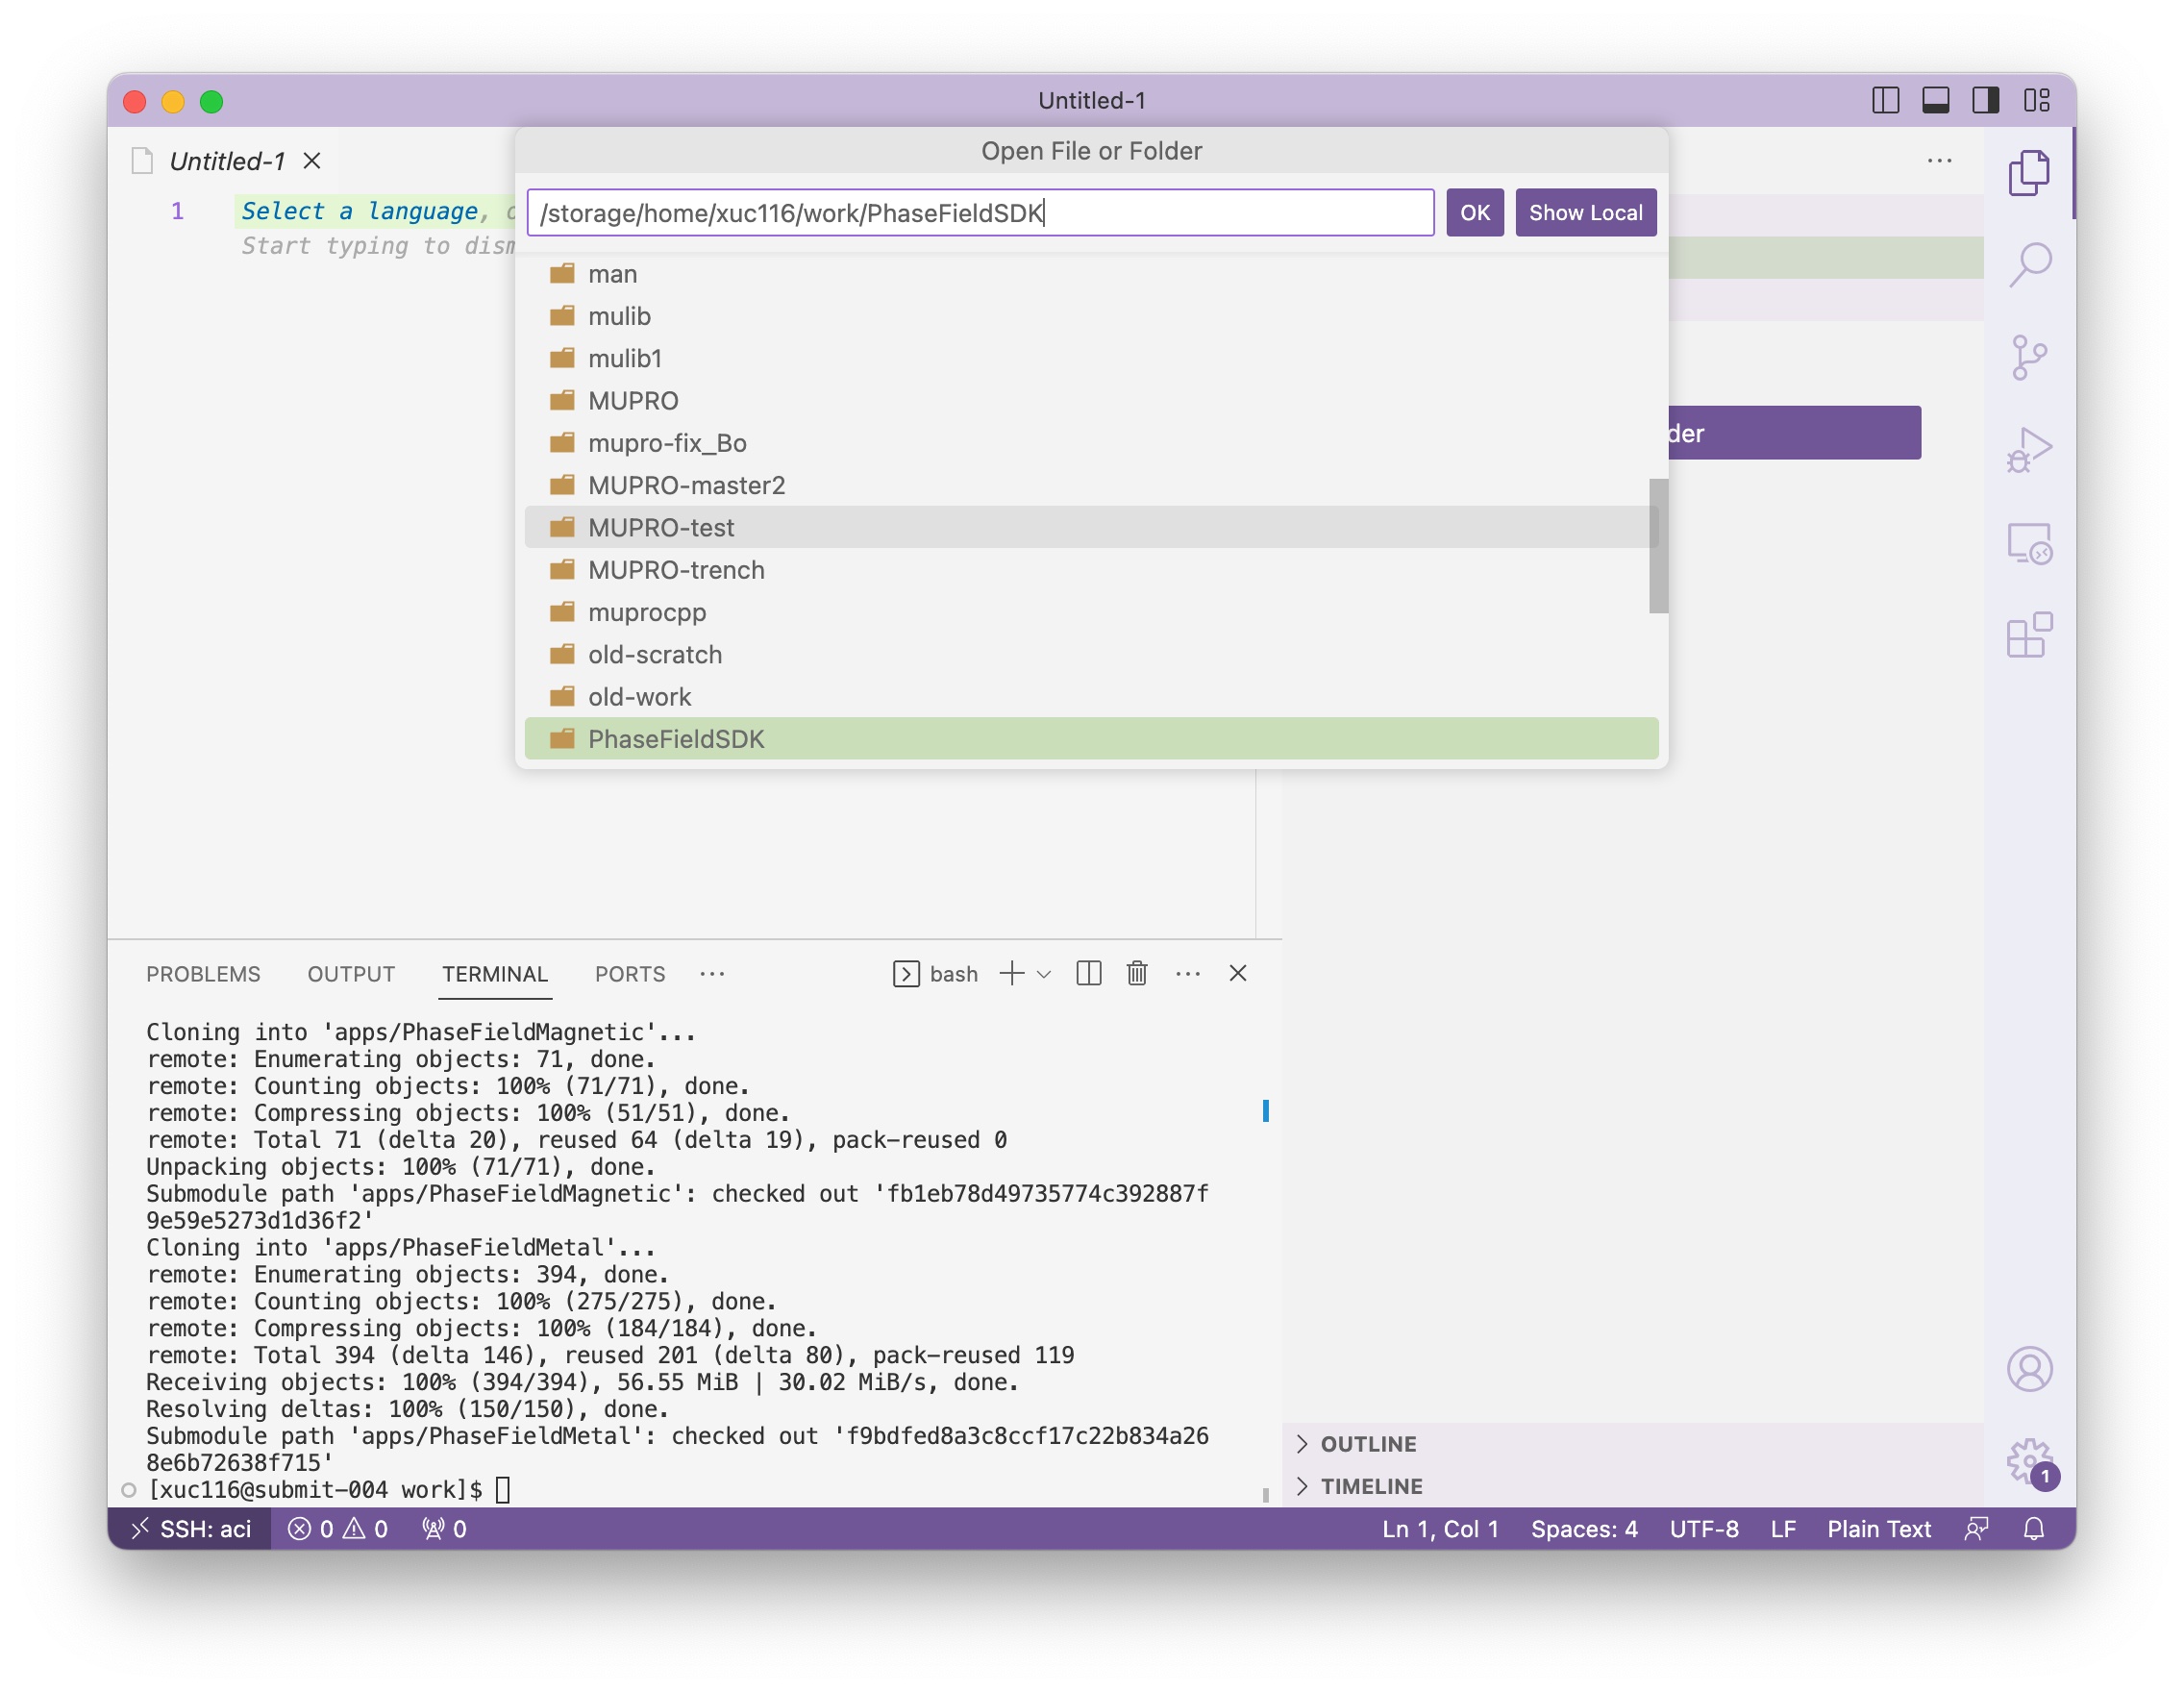
Now click the Open Folder button in the side panel, and you will be prompted with an input box. Type and navigate to the PhaseFieldSDK directory you just cloned and click ok.
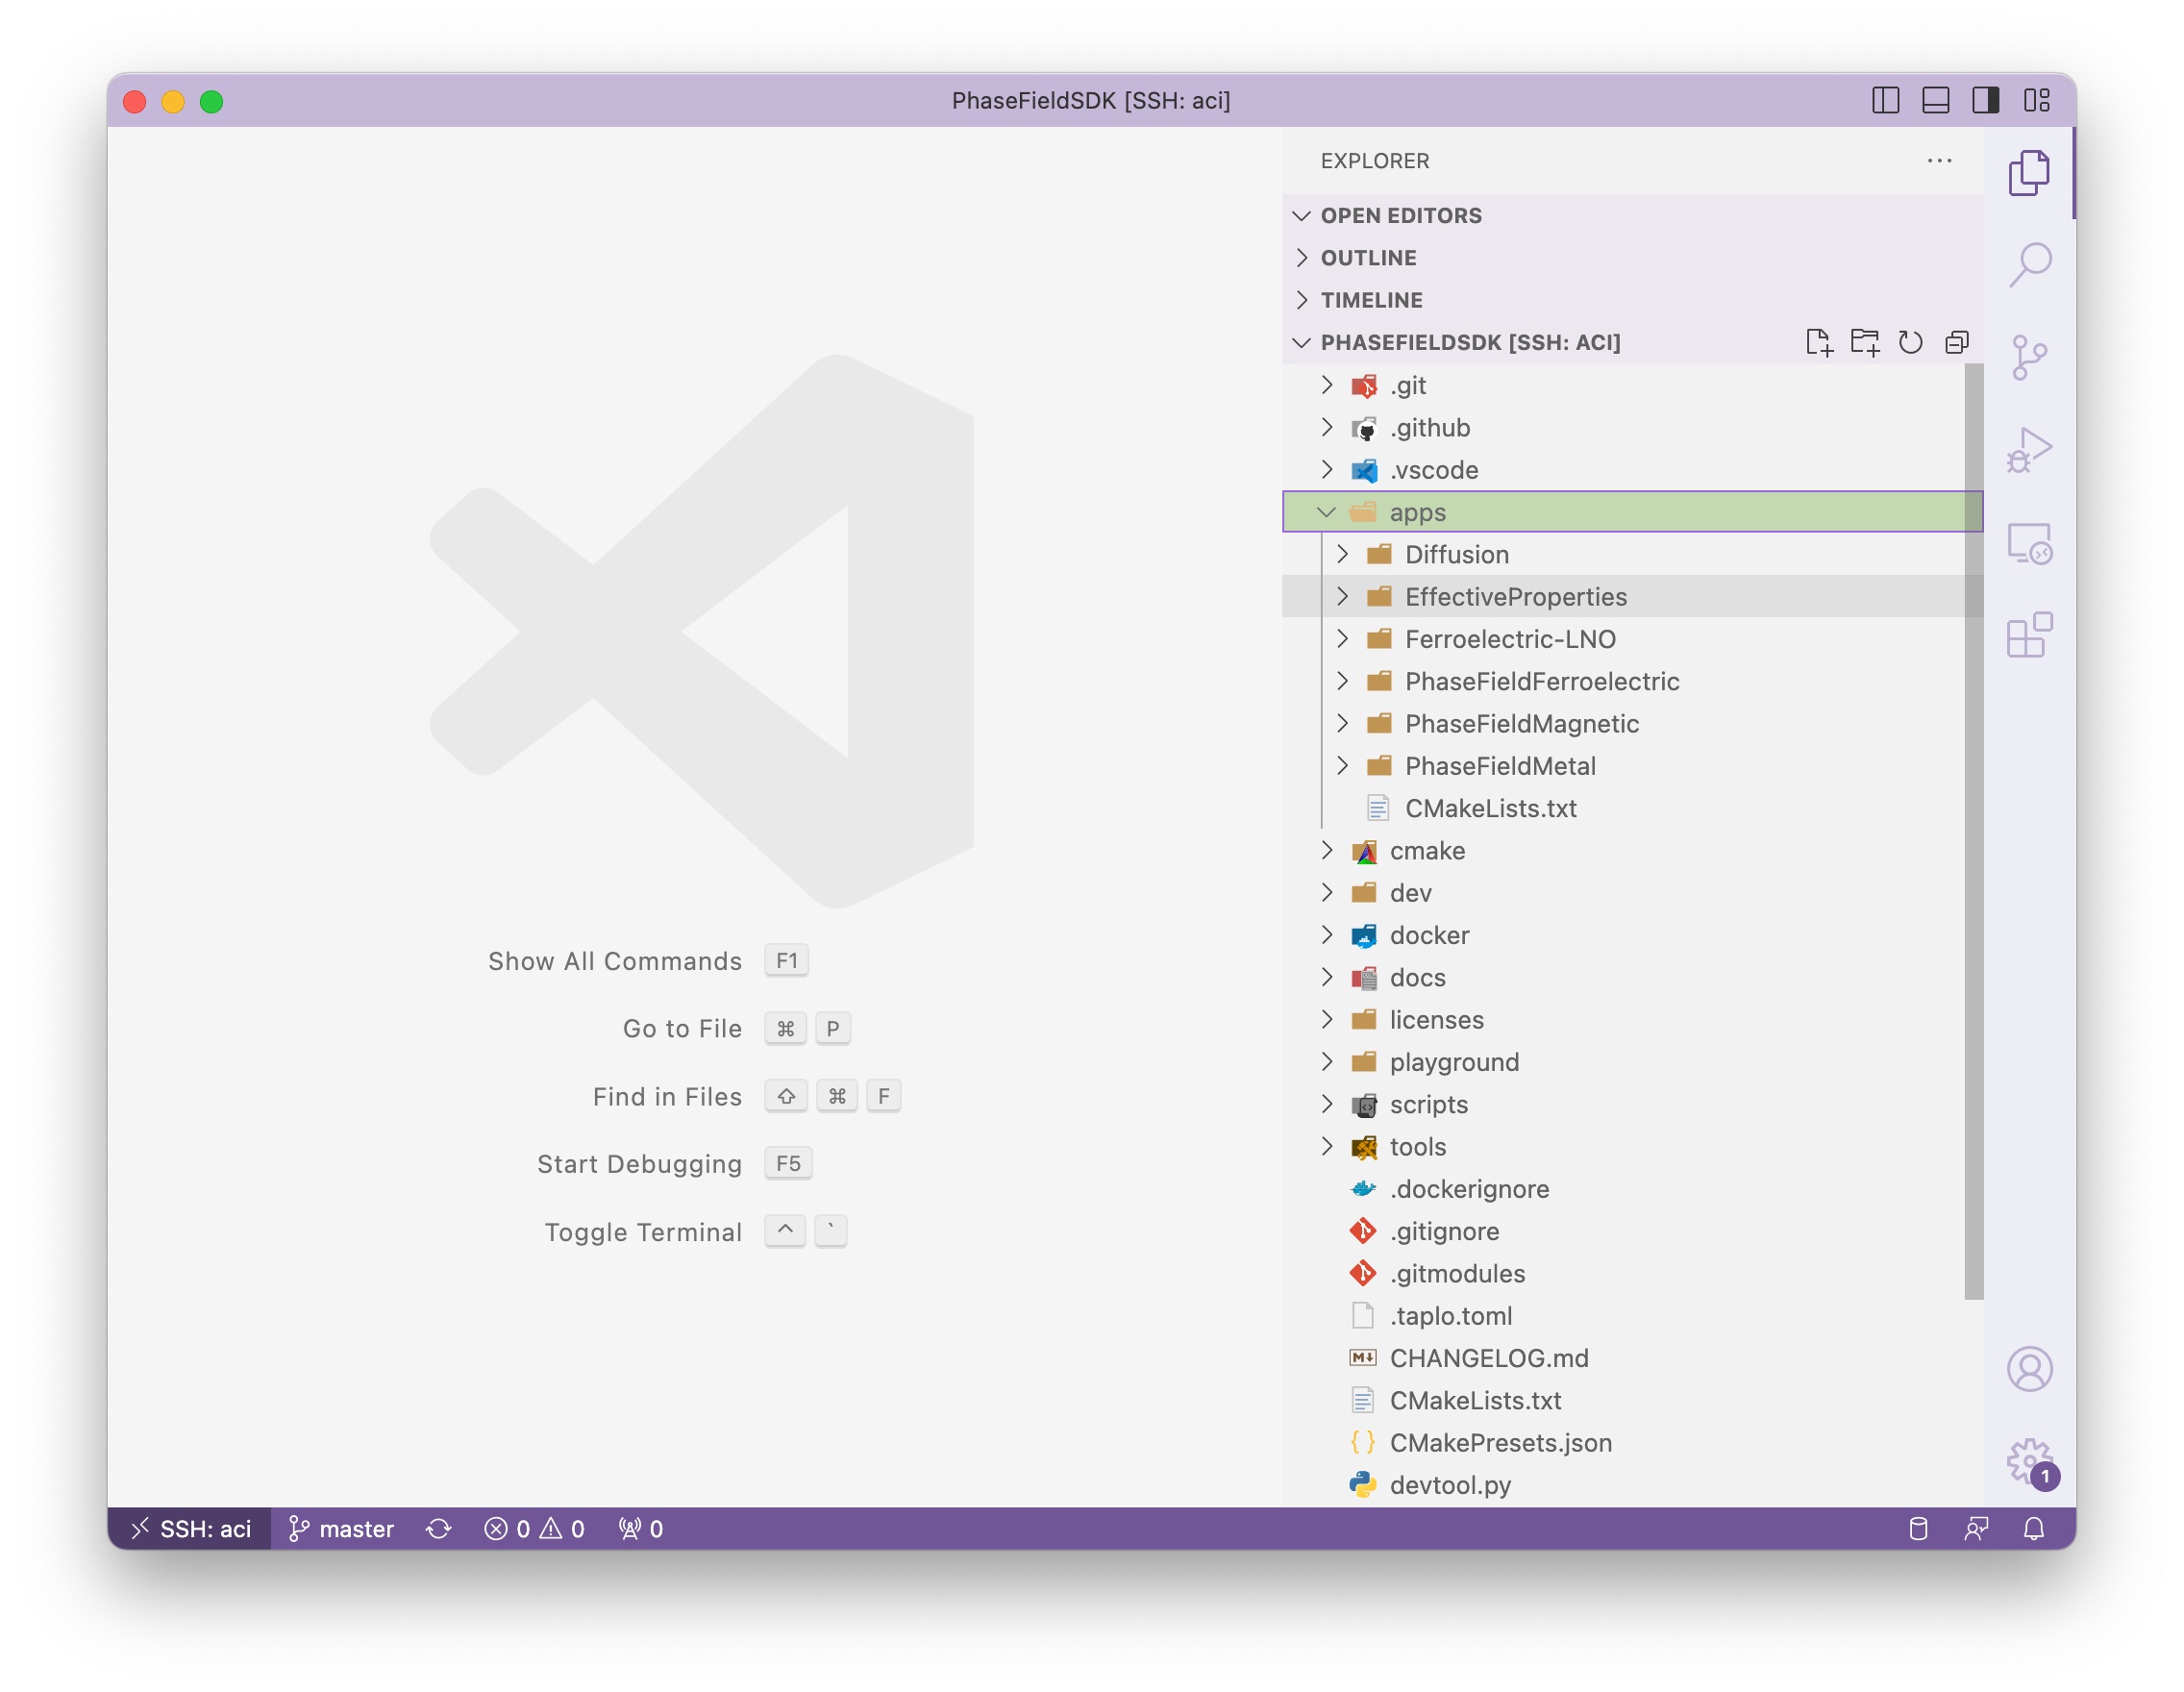
Please check the subdirectories under apps folder and see if they are populated. If not, then the submodule is not cloned properly, you may use this command to load the submodules in an already cloned repository git submodule update --init --recursive. If you don’t see the terminal panel, you can use the shortcut ctrl+`, or click View/Terminal in the menu.
Step 4: Future visit of the source code
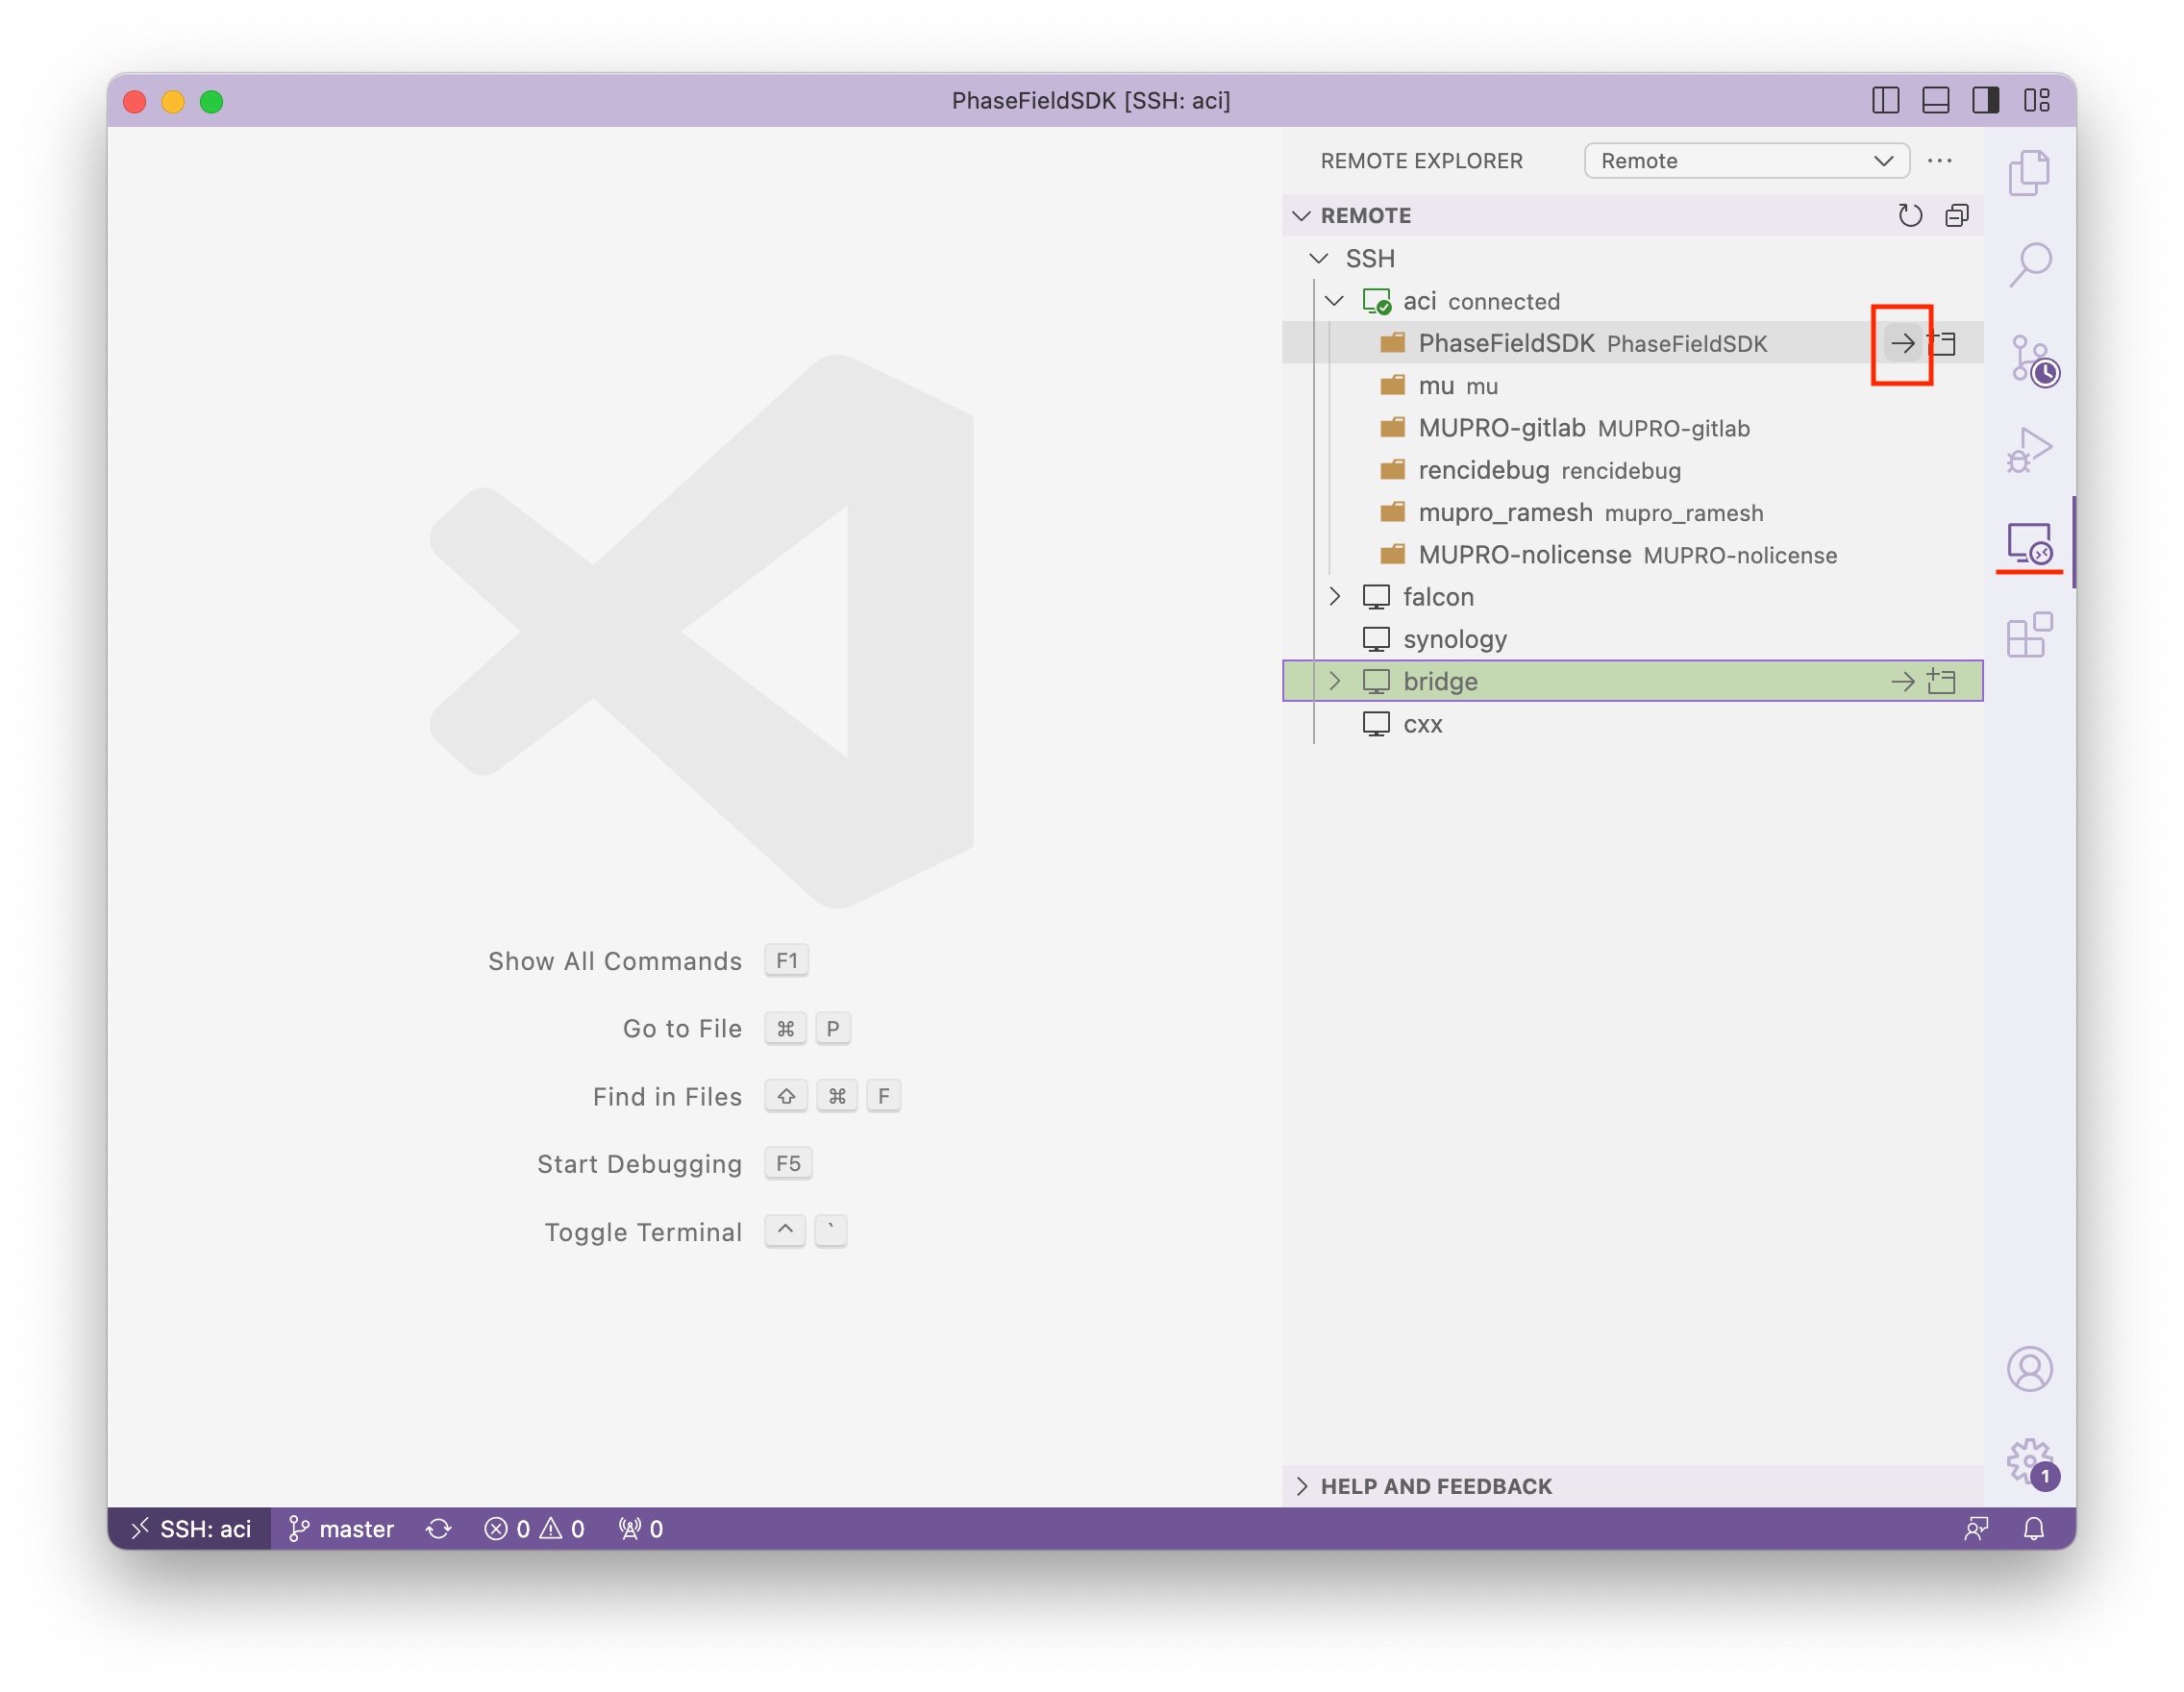
Since you have opened the PhaseFieldSDK folder once in vscode, future access to the same folder will become a lot easier.
Click the Remote Explorer plugin on the vertical toolbar, then click the right arrow icon to the right of PhaseFieldSDK folder under the aci host, and you should be directed to the PhaseFieldSDK folder automatically.
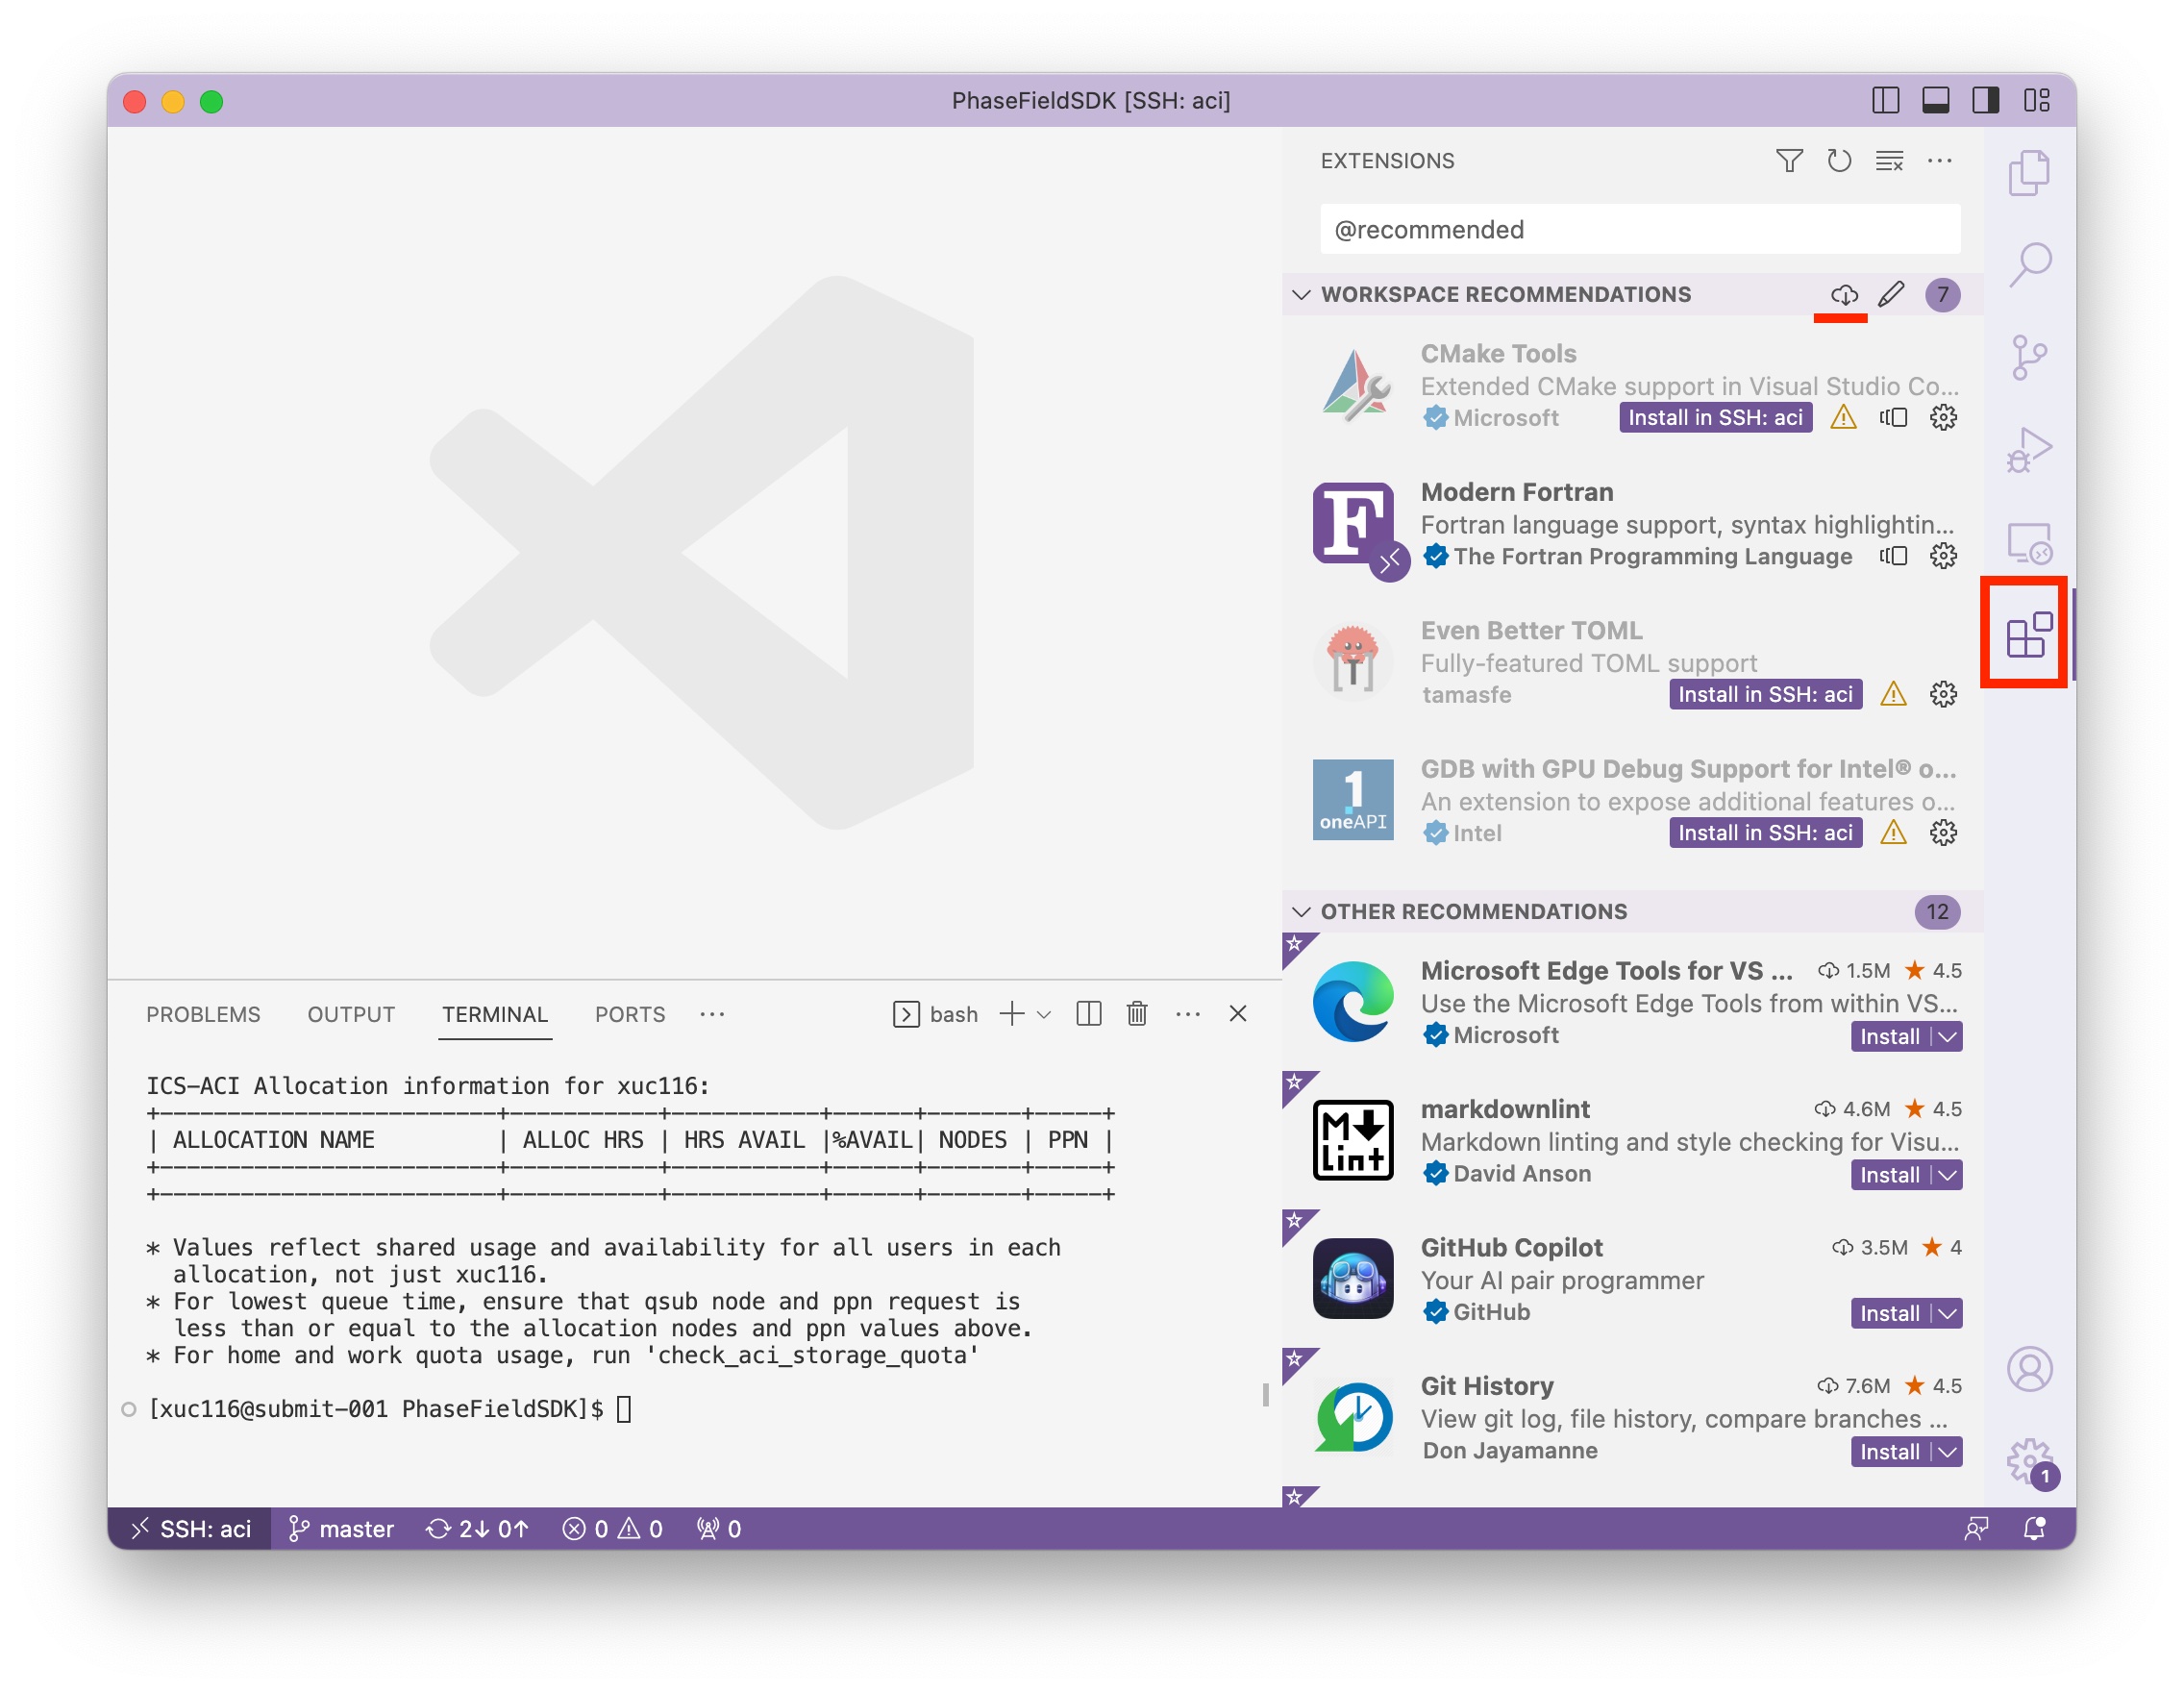
Step 5: Install extensions
- Click the extension icon in the vertical toolbar
- Type
@recommendedand hit enter in the input box - Click Install Workspace Recommended Extensions button next to the newly appeared section
WORKSPACE RECOMMENDATIONS. - Then click
Install (Do not sync)in the pop-up window. You can also chooseInstalldepending on whether you want the extensions been synced across other computer that you installed vscode.
Step 6: Install extension used tools
You need to first get python and pip, then install the binaries using pip, and lastly add the installed directory to your PATH variable.
module load python
python -m pip install --user fortls
python -m pip install --user cmake_format
echo 'export PATH="$PATH:$HOME/.local/bin"' >> ~/.bashrc
source ~/.bashrc